(This post may contain affiliate links, which do not change or affect your price in any way. This simply allows me to collect a small commission when something is purchased through one of the links I provide on my page. Thank you for supporting Sycamore and Slate! Read my full disclosure here.)
I recently organized all my jewelry, which is about 92% earrings. I’d been tossing them all in a dresser drawer at the end of the day, and it was getting a little out of control in there.
I’ve never really worn a lot of jewelry. It just always seemed so bulky and awkward and when I was growing up I didn’t (and still don’t) have a gift for fashion and knowing how to mix and match that kind of stuff.
Fun fact: I didn’t even have my ears pierced until I was 23, about a month before my wedding. I actually got them pierced specifically for my wedding day. Is that crazy? Anyone else done that, too? Anyway, earrings ended up being my favorite accessory ever, and are now the only jewelry I consistently wear (other than my wedding rings).
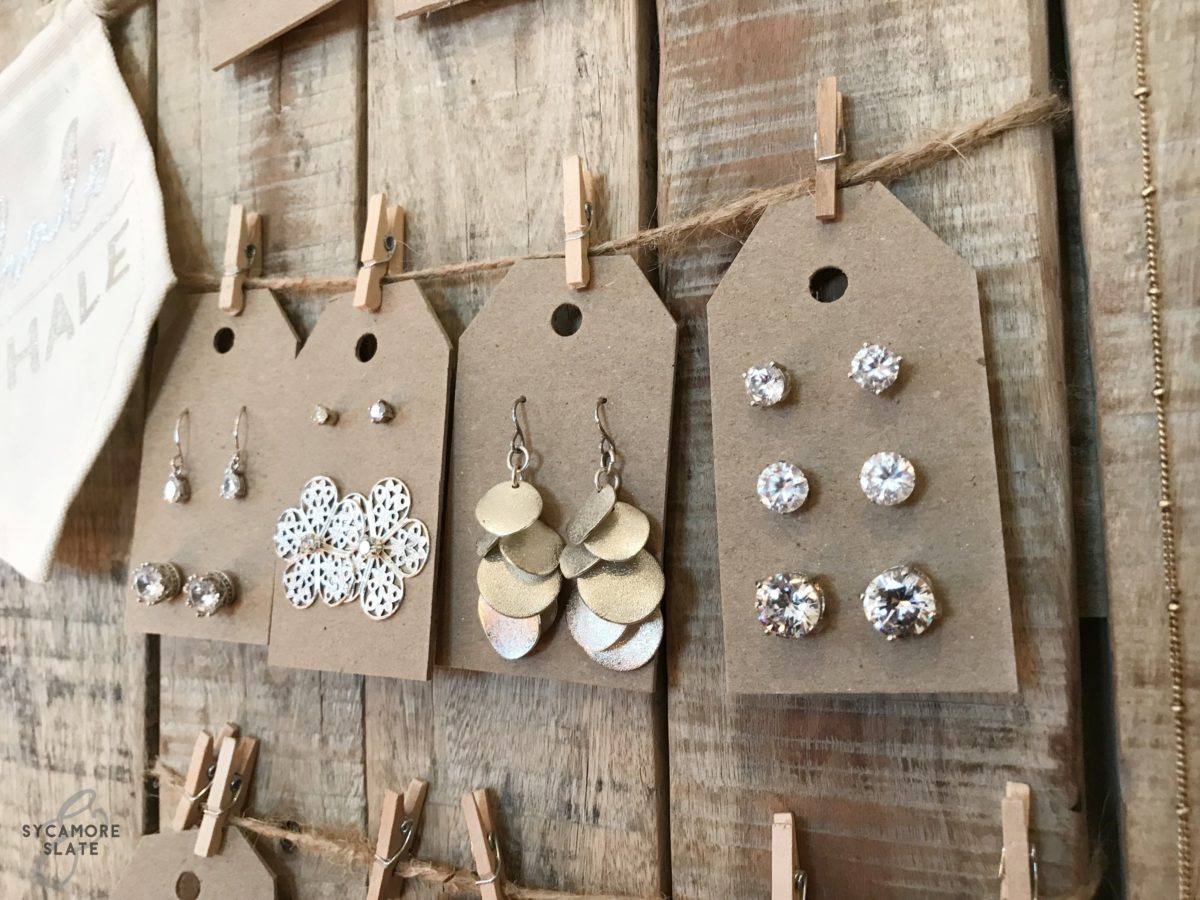
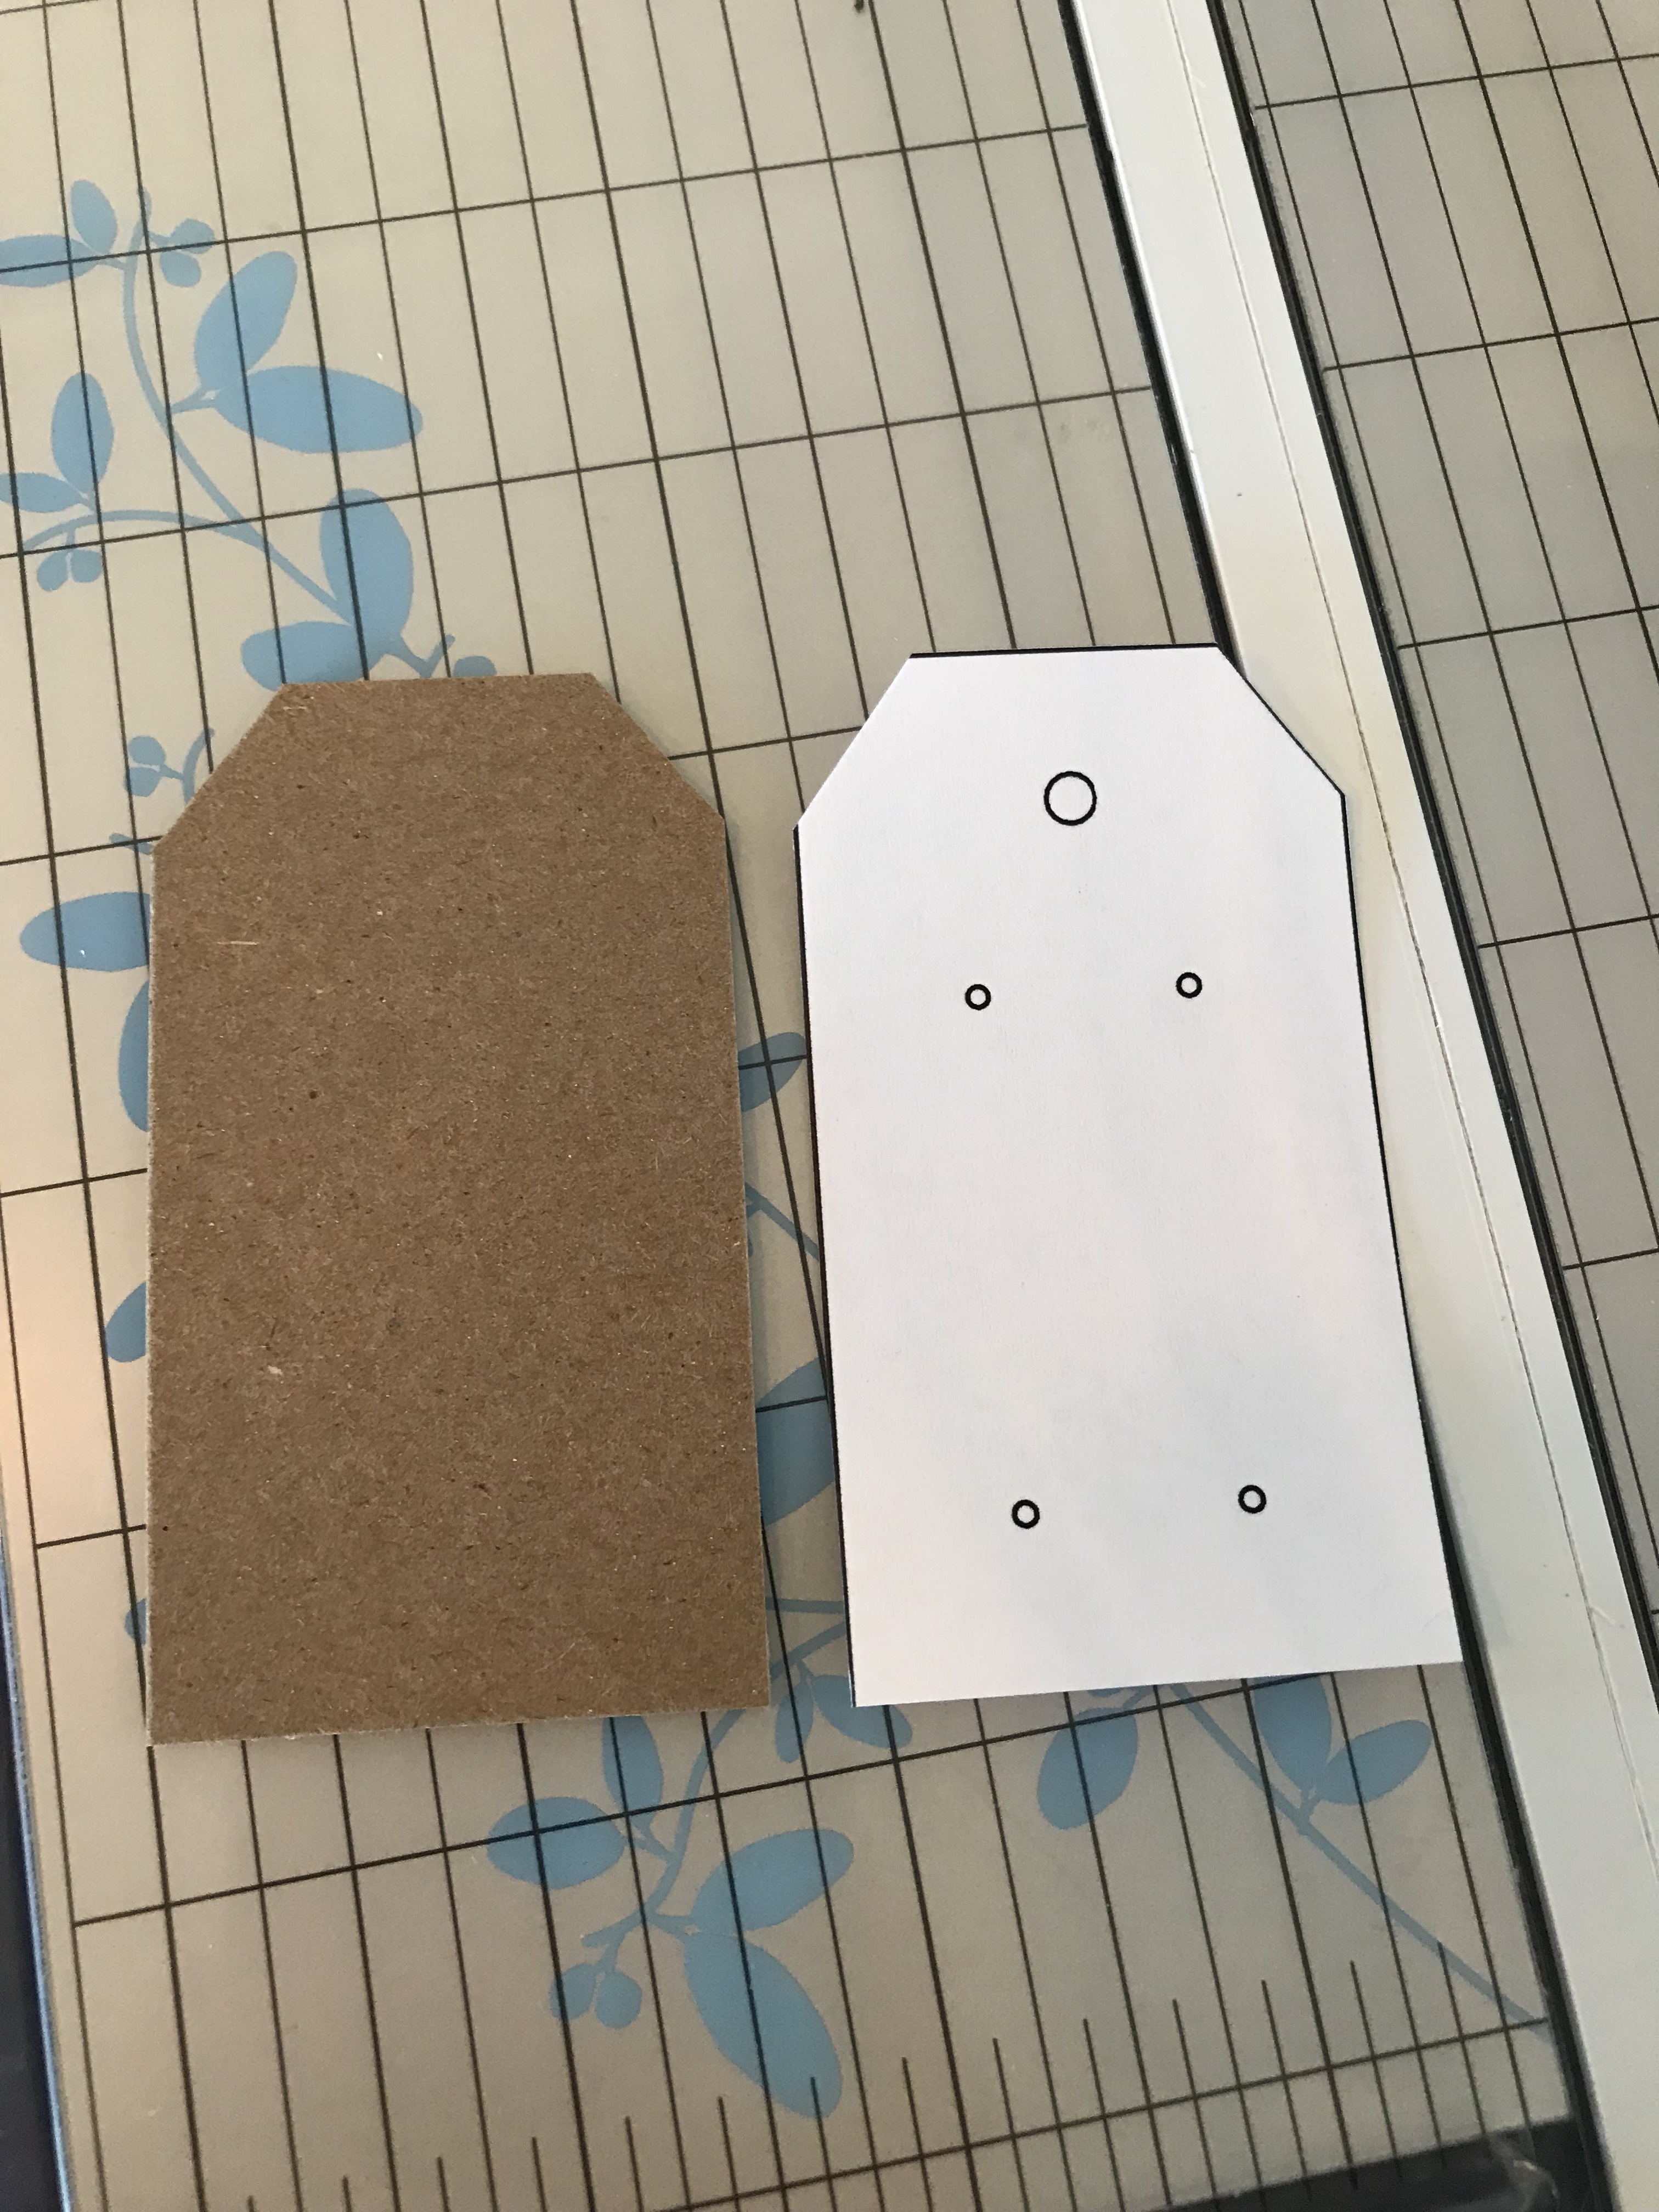
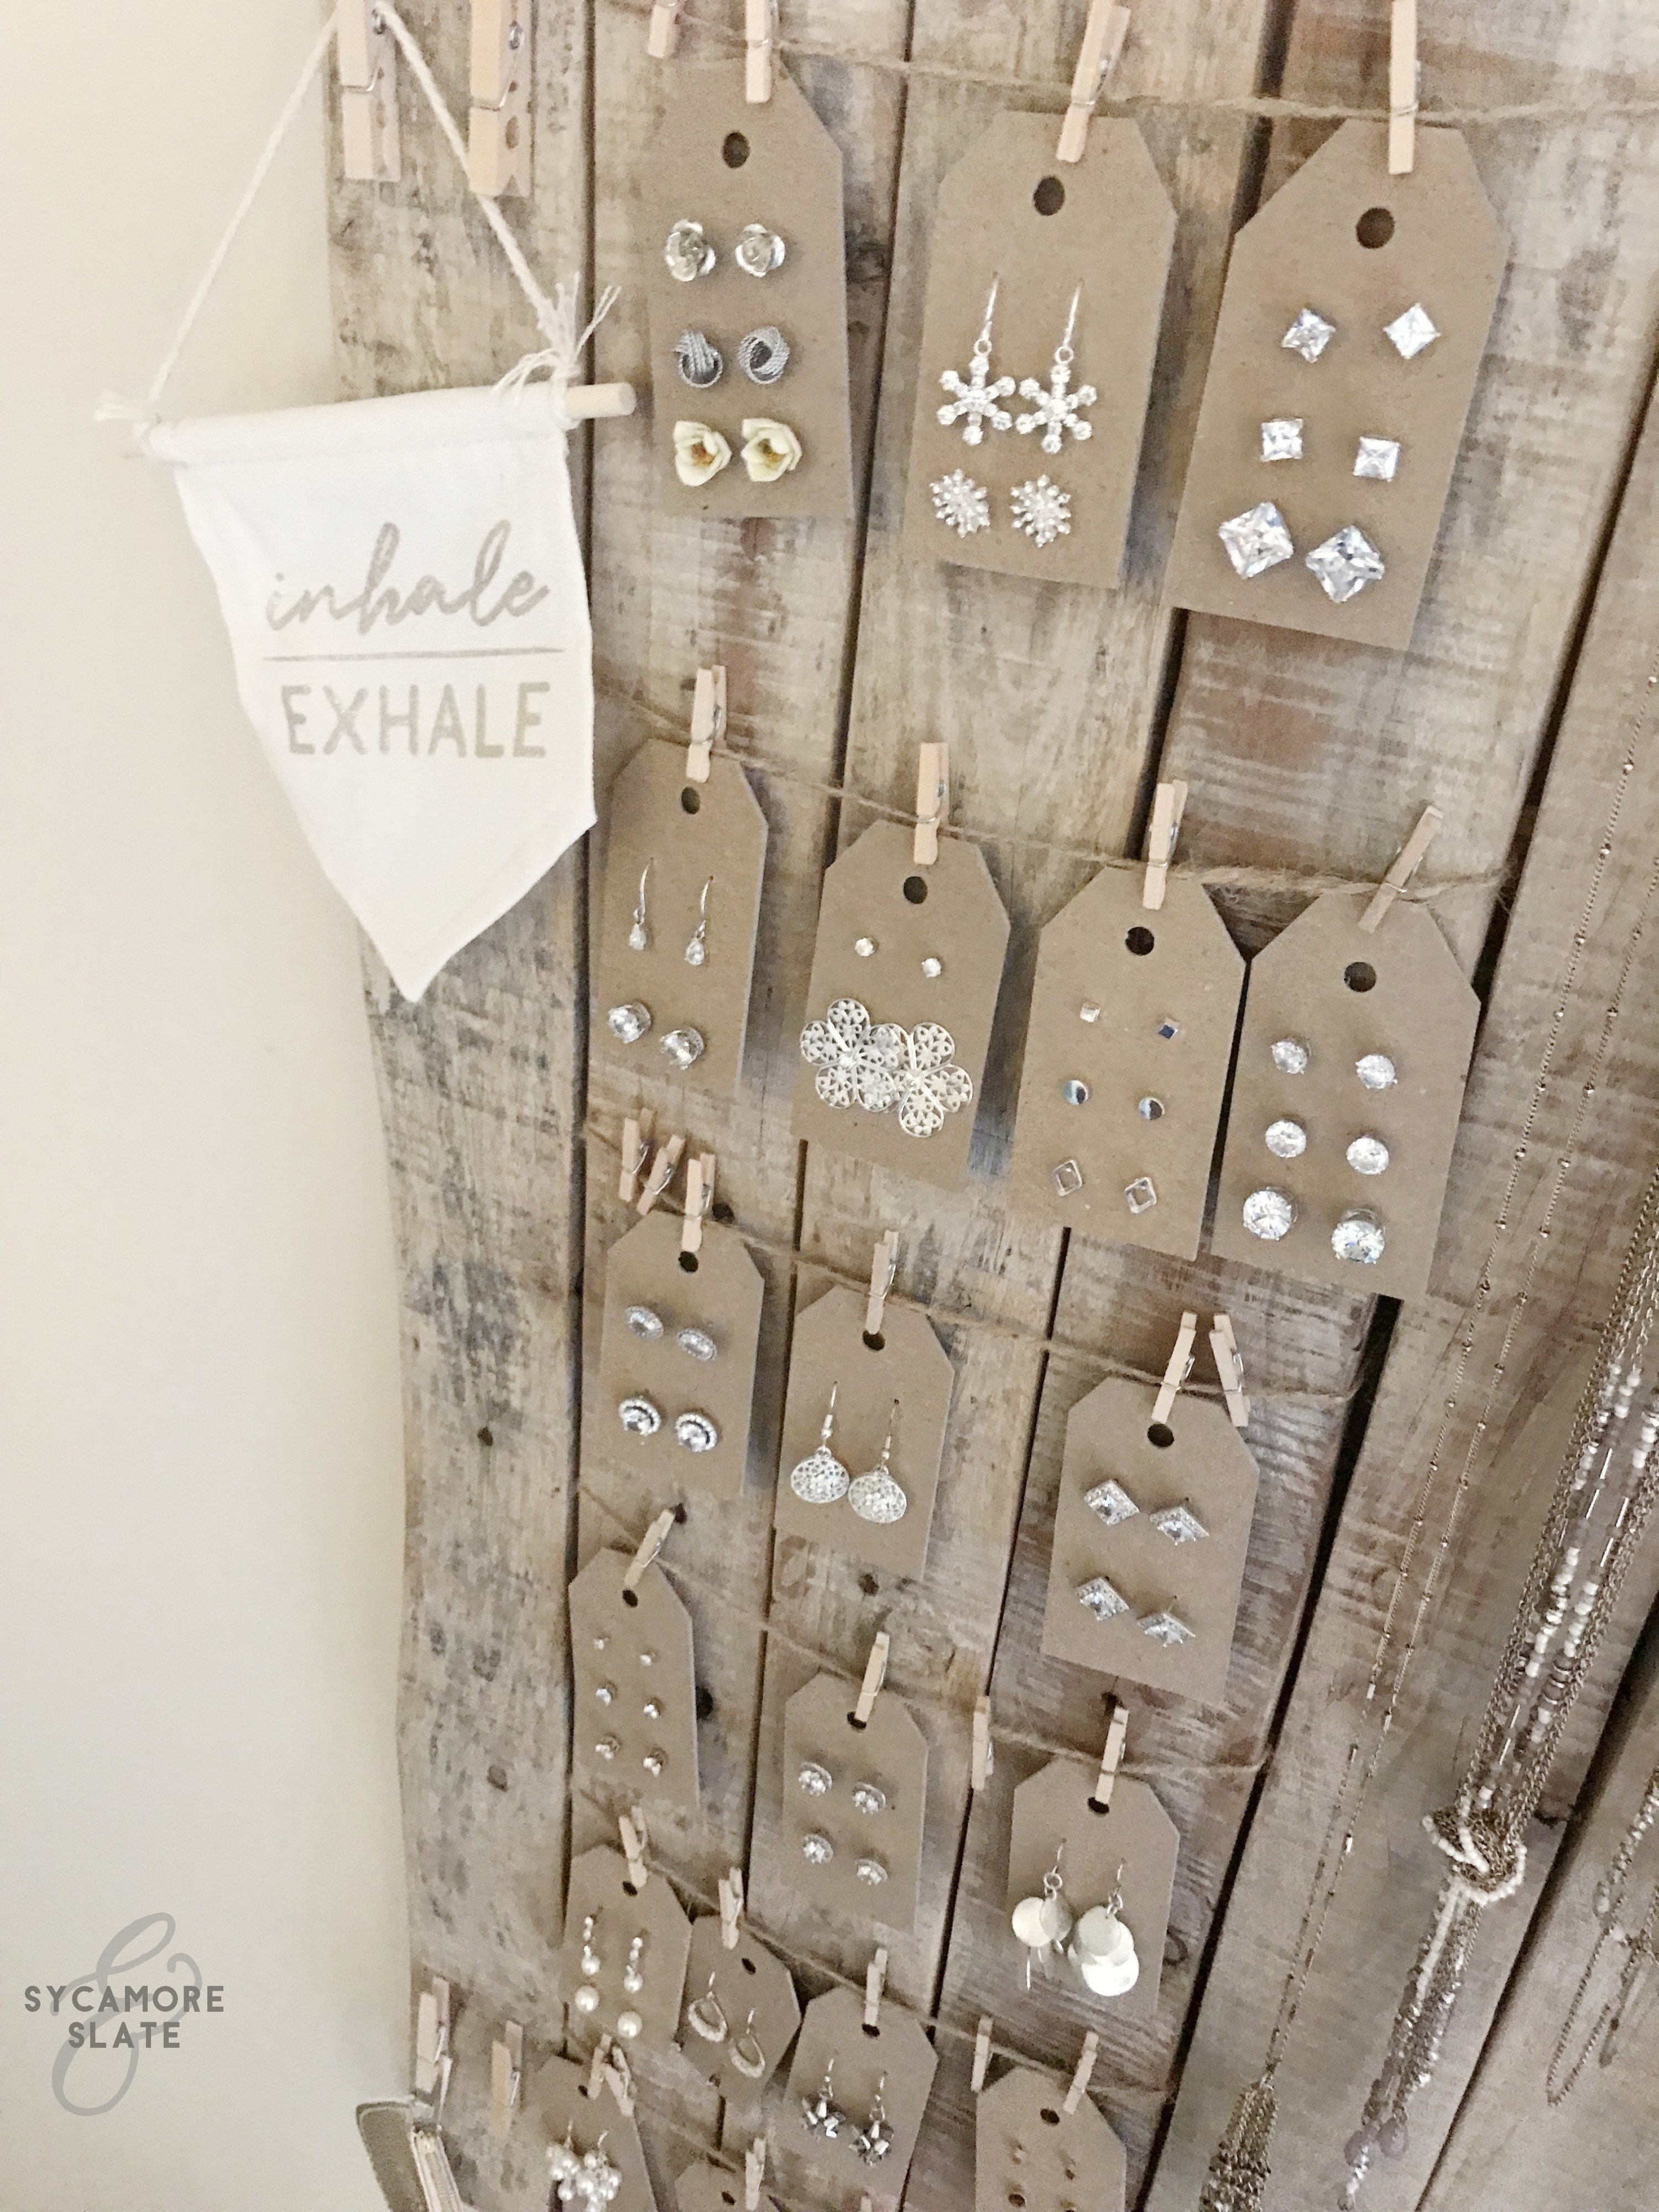
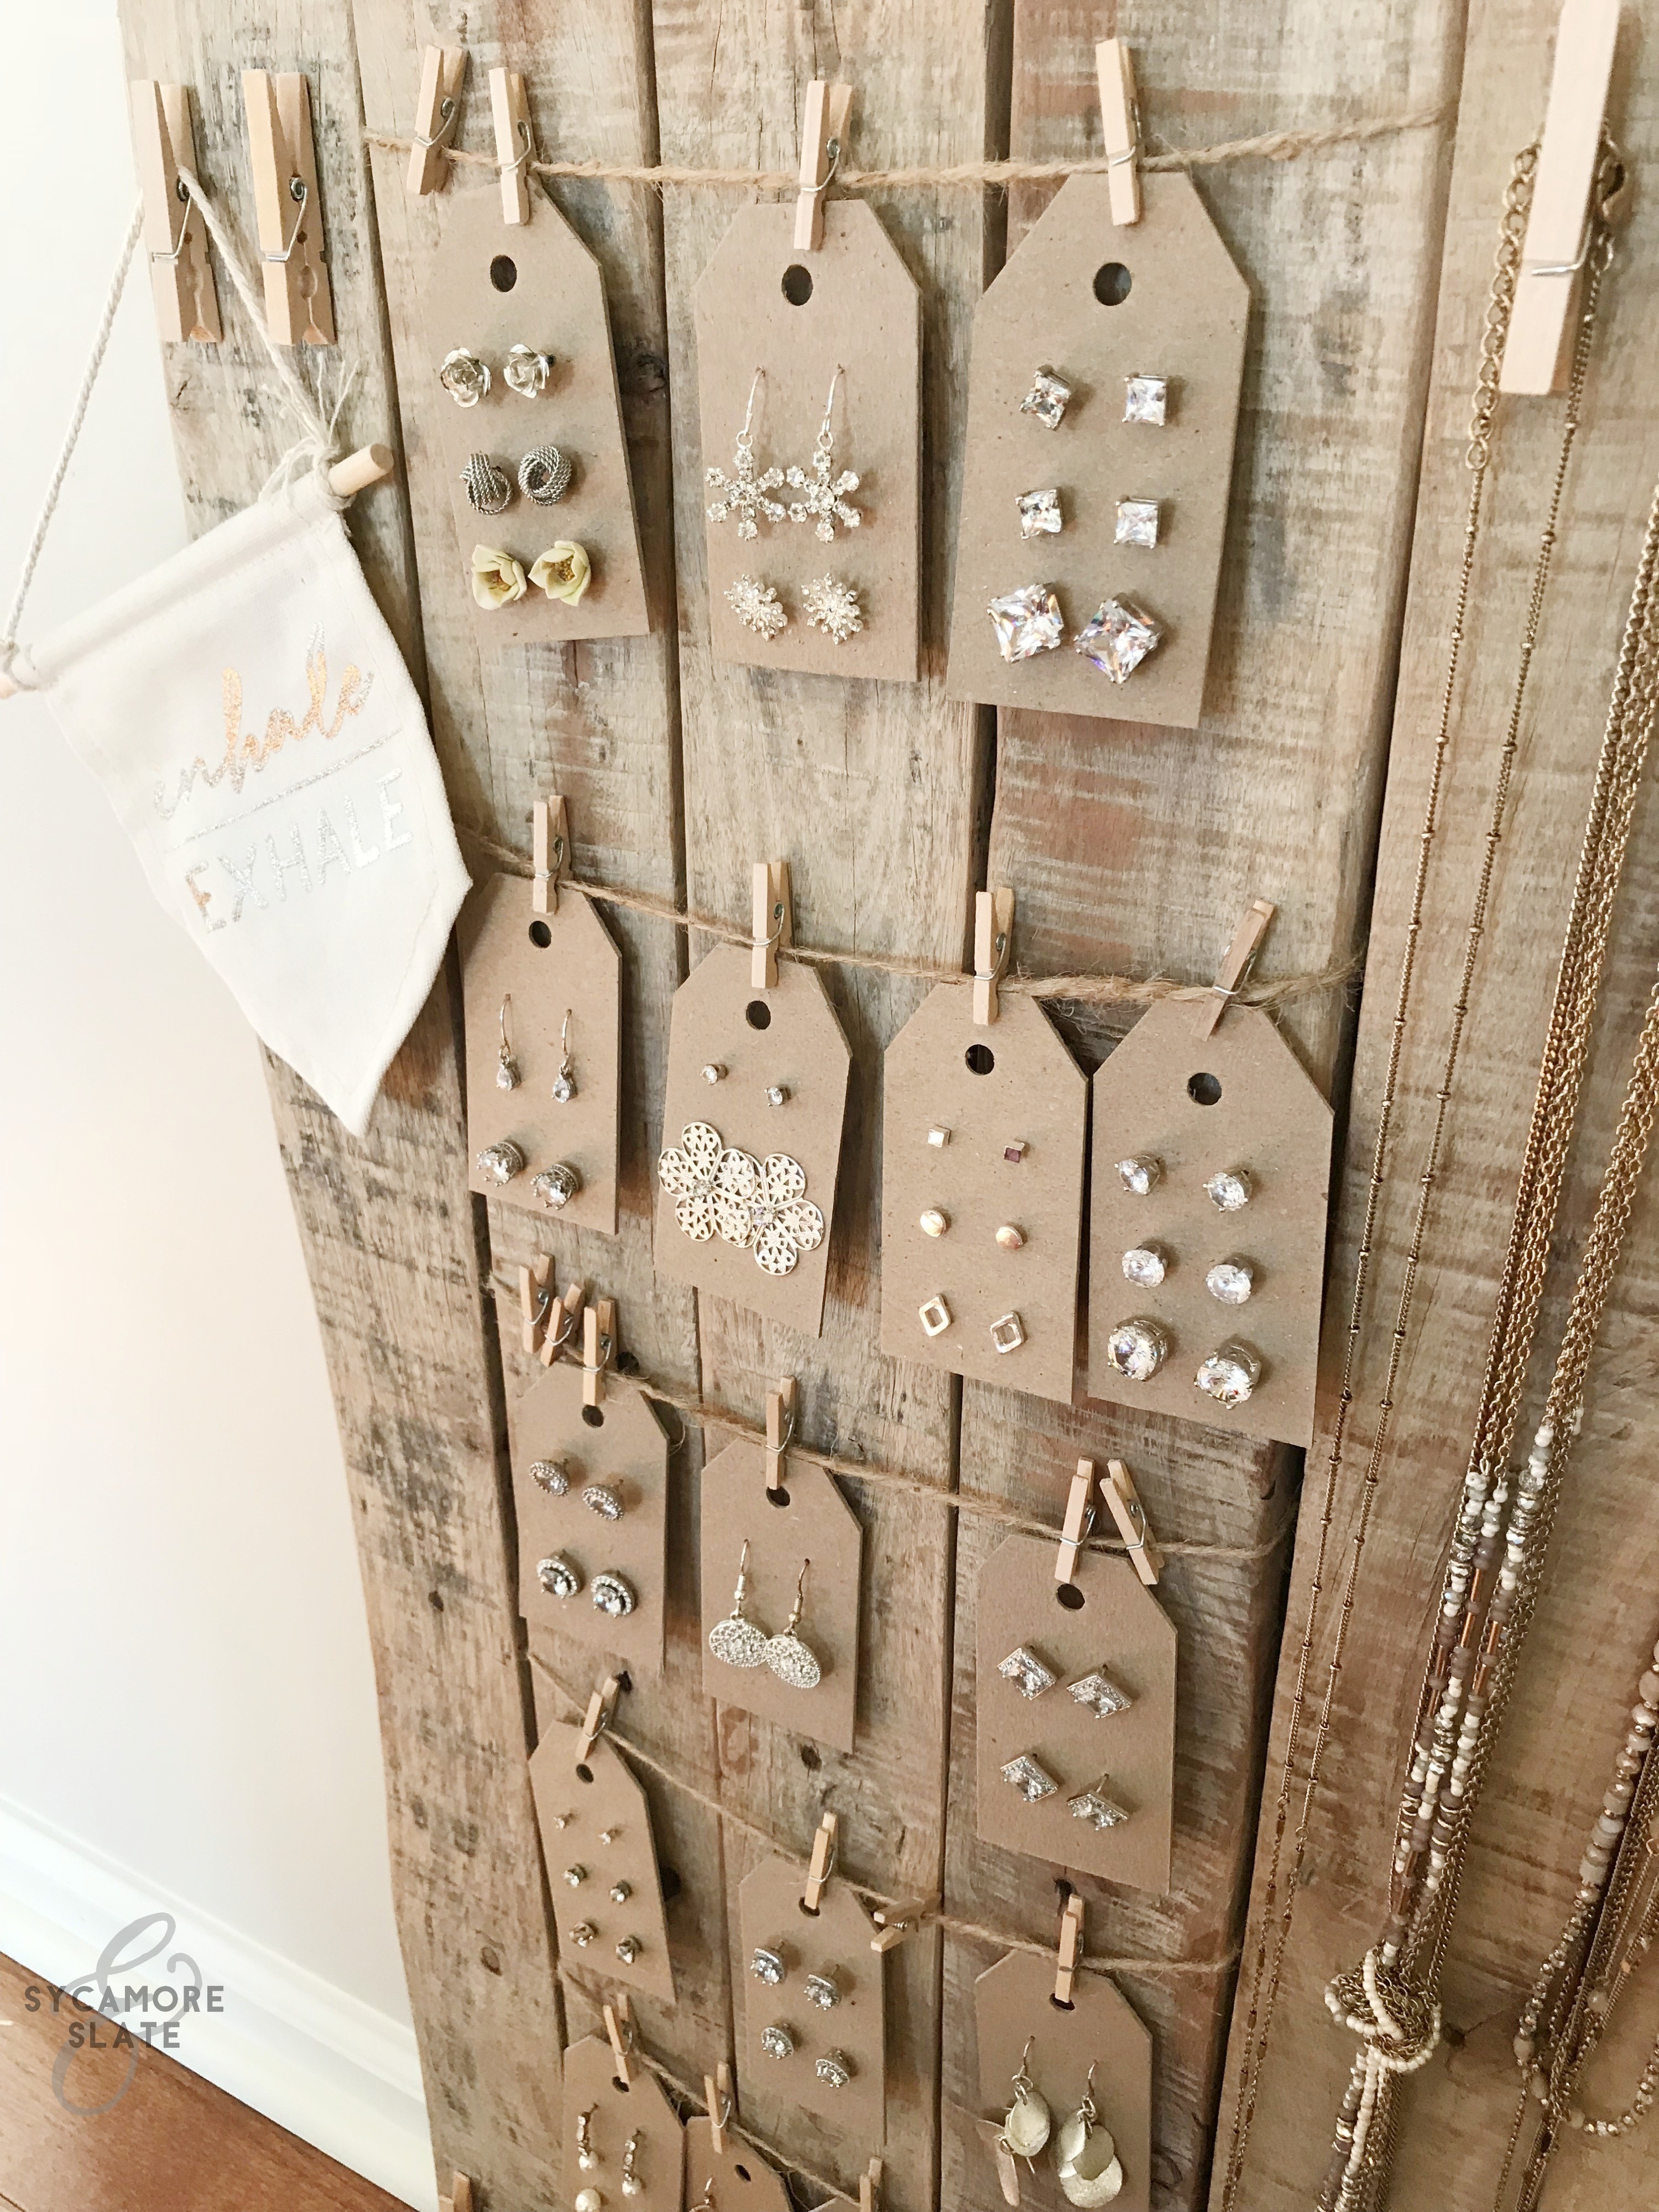
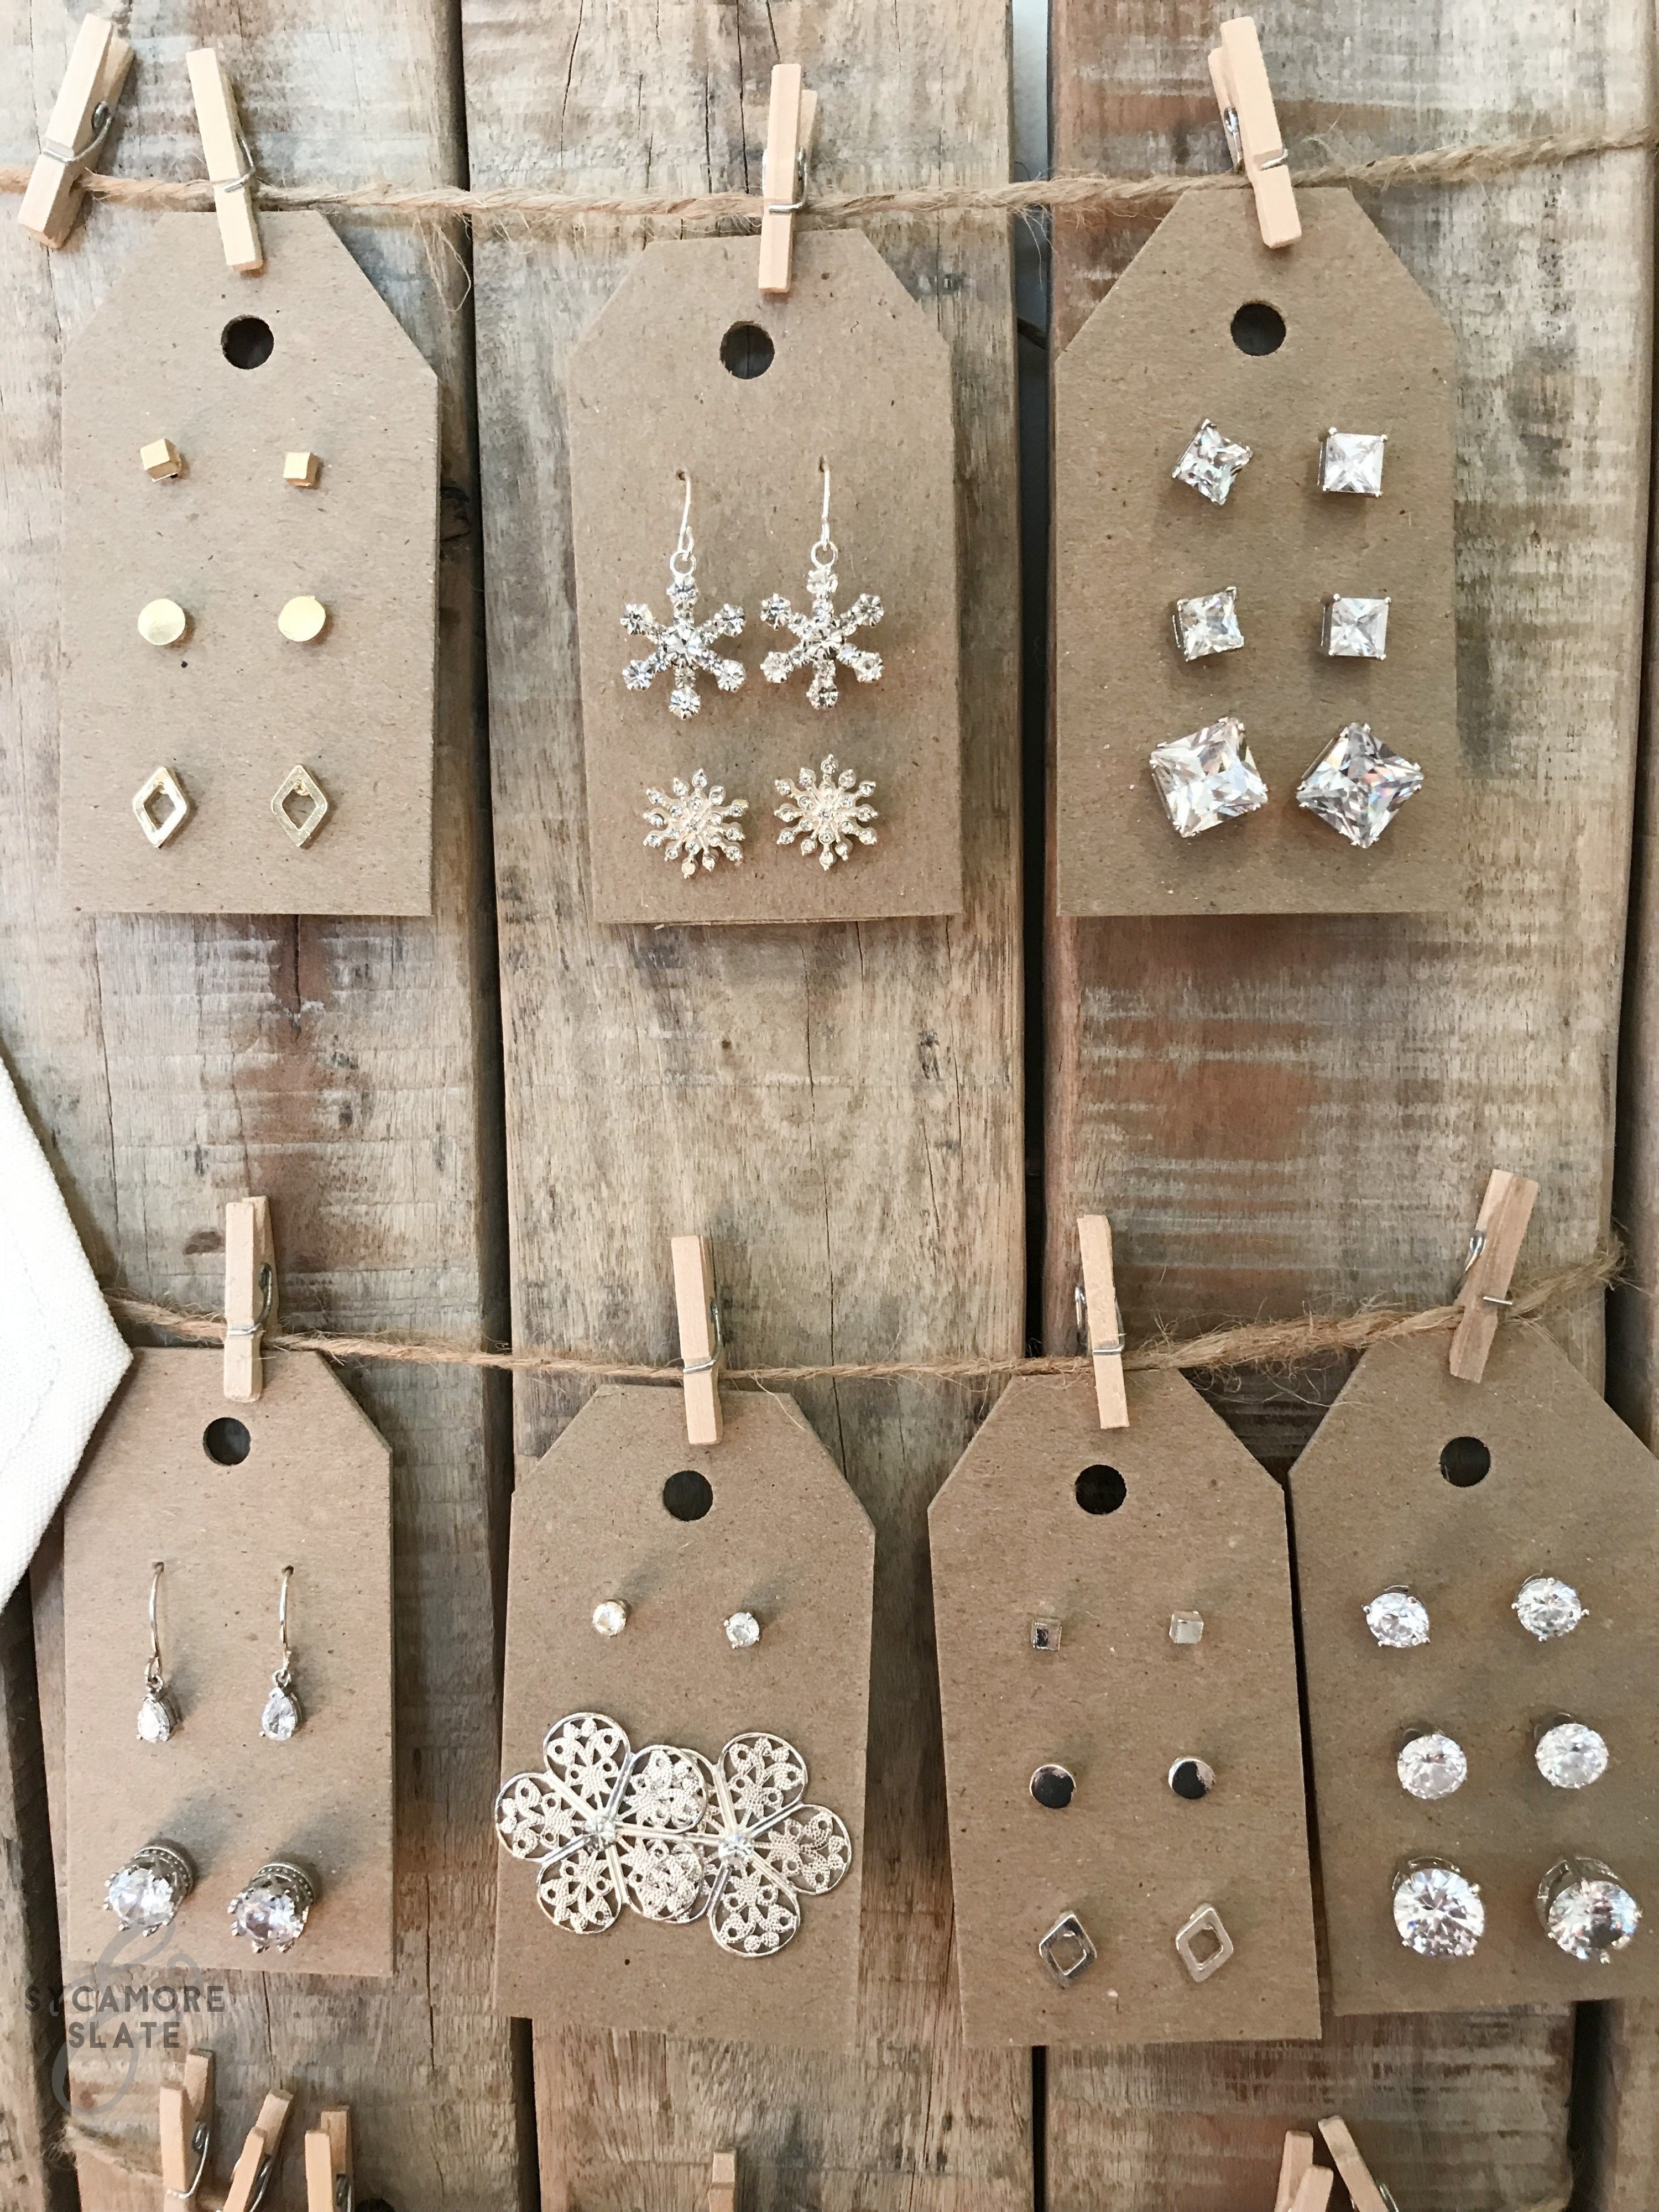
I went on Pinterest, of course, to find some ideas about how to get my earrings organized. The problem I ran into pretty quickly was that most of the options I found were intended to hang hook-style earrings. While I do have some of these, the vast majority of my collection are stud earrings with posts. In other words, you can’t just simply hang them on something. After some thought, I determined that the best way to organize them was the exact same way they came from the store: attached to those little tag-style earring cards.
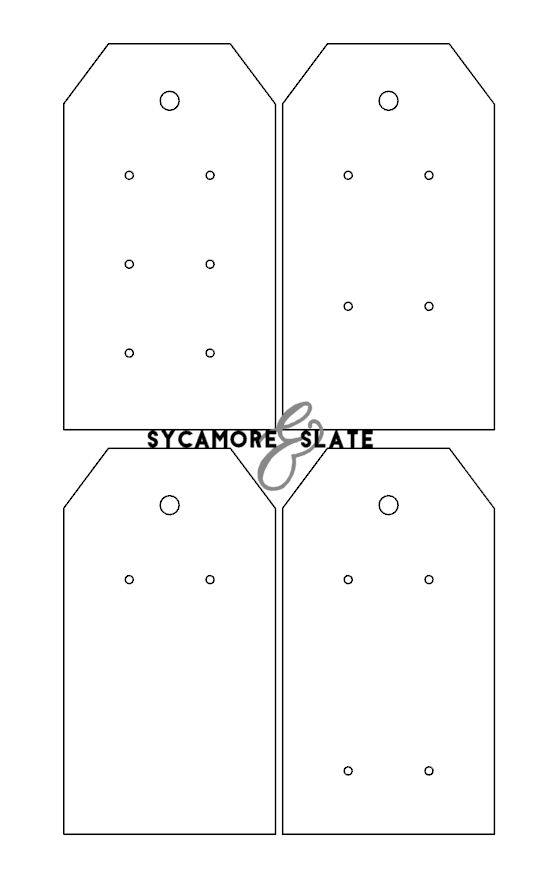
I used Silhouette Studio to create a full 8.5″ x 11″ page worth of the tags. The tags were very easy to create using a cut file that I already had in my digital library. I only did a tiny bit of editing to my already existing design to get the size and shape card I was looking for.
You can easily purchase a tag design on the Silhouette Design Store or just make one yourself on Studio. OR if you’d rather not mess with all of that, I’m offering my tag printout as a FREE download for you to print and make your very own earring tags! You’ll find the download link at the bottom of this post.
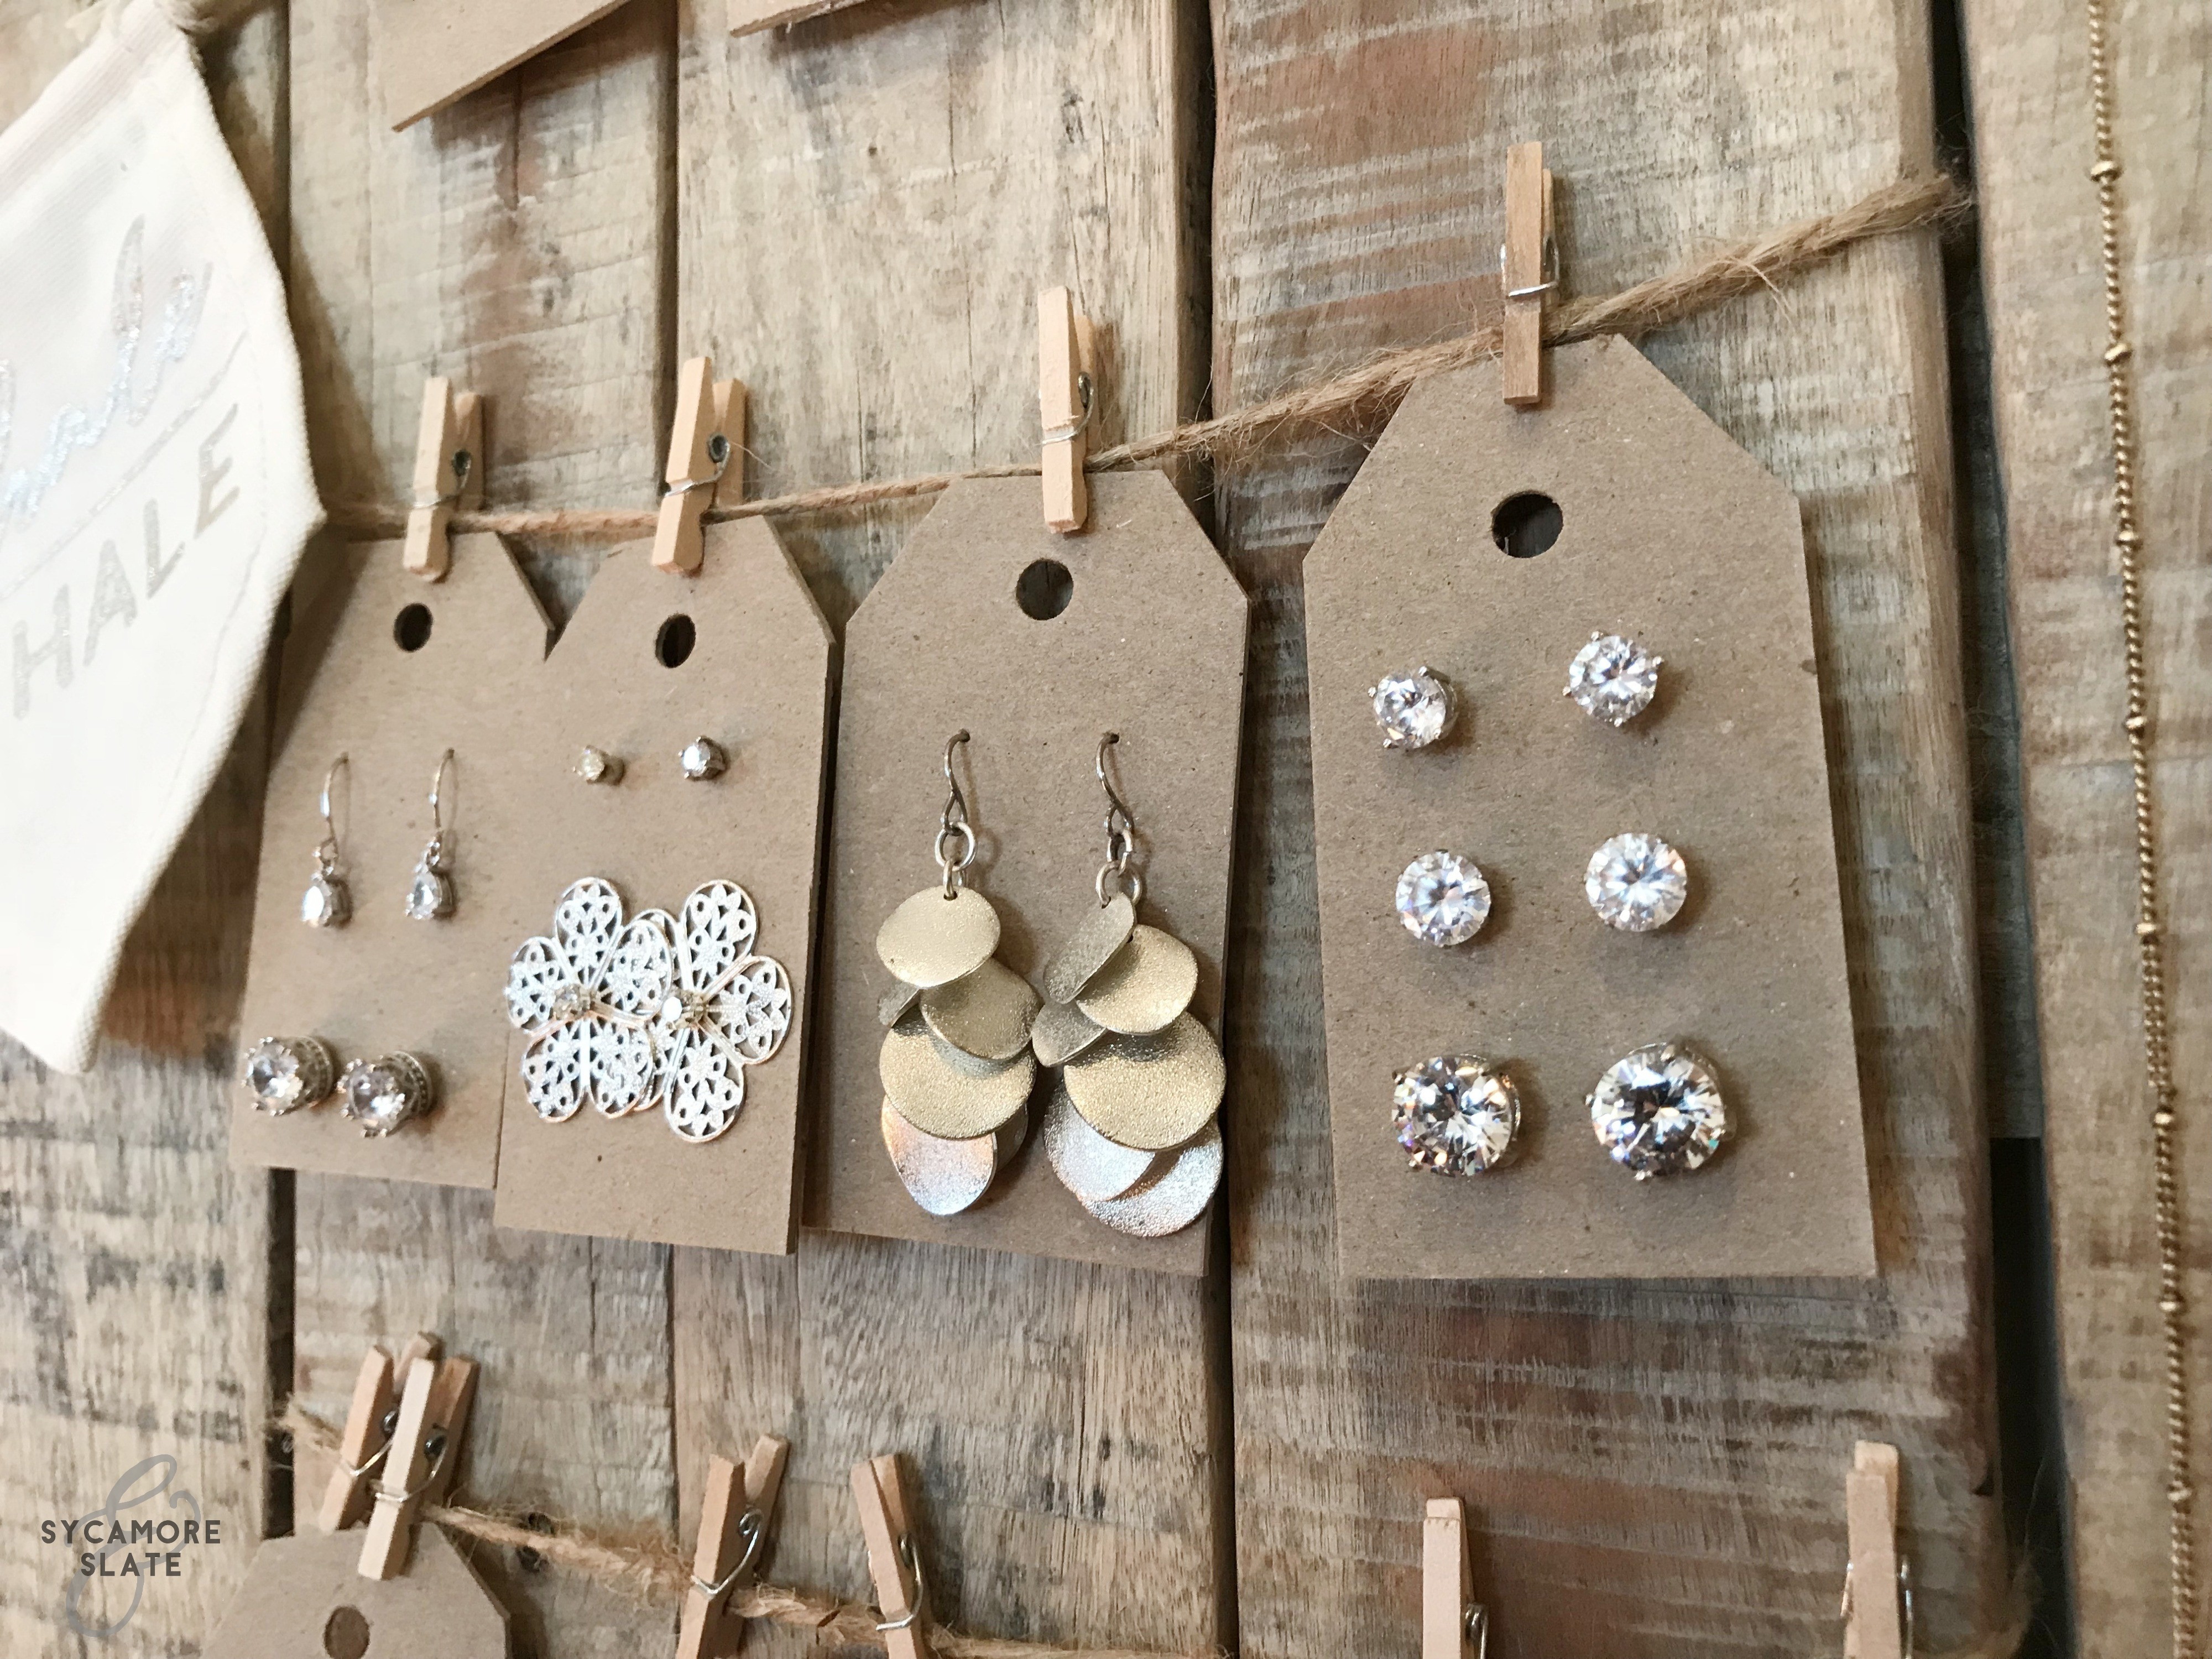
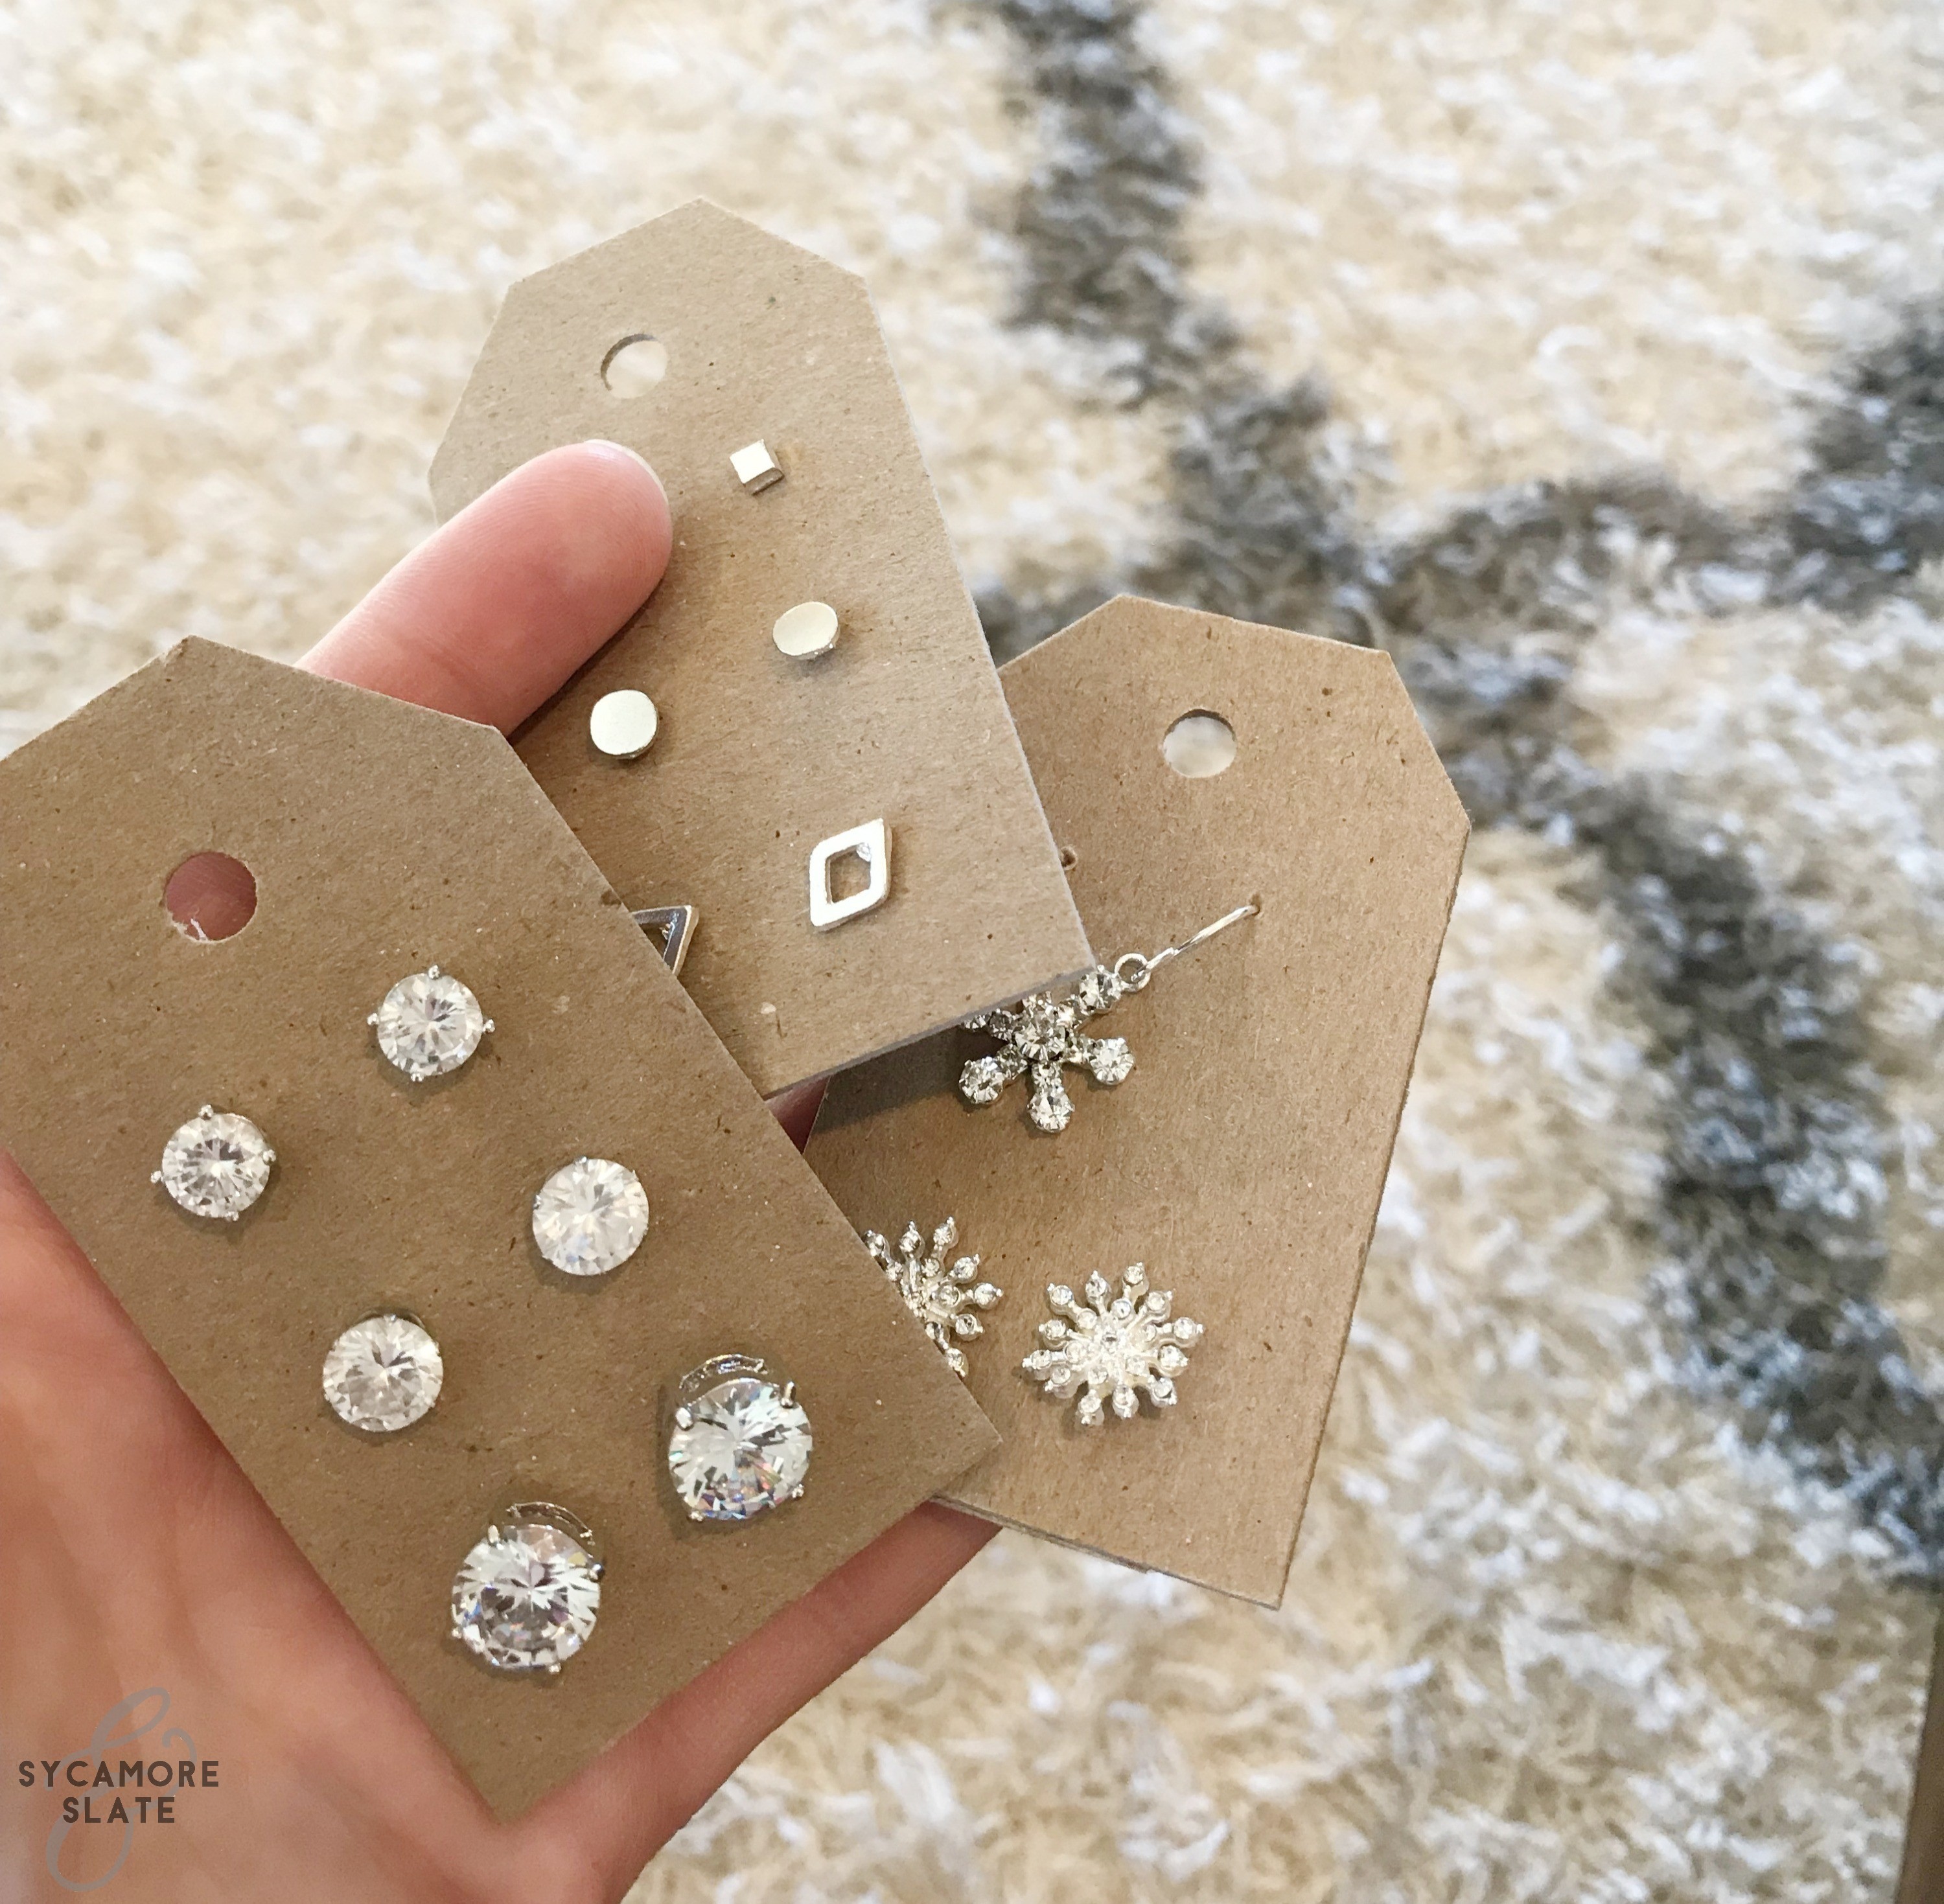
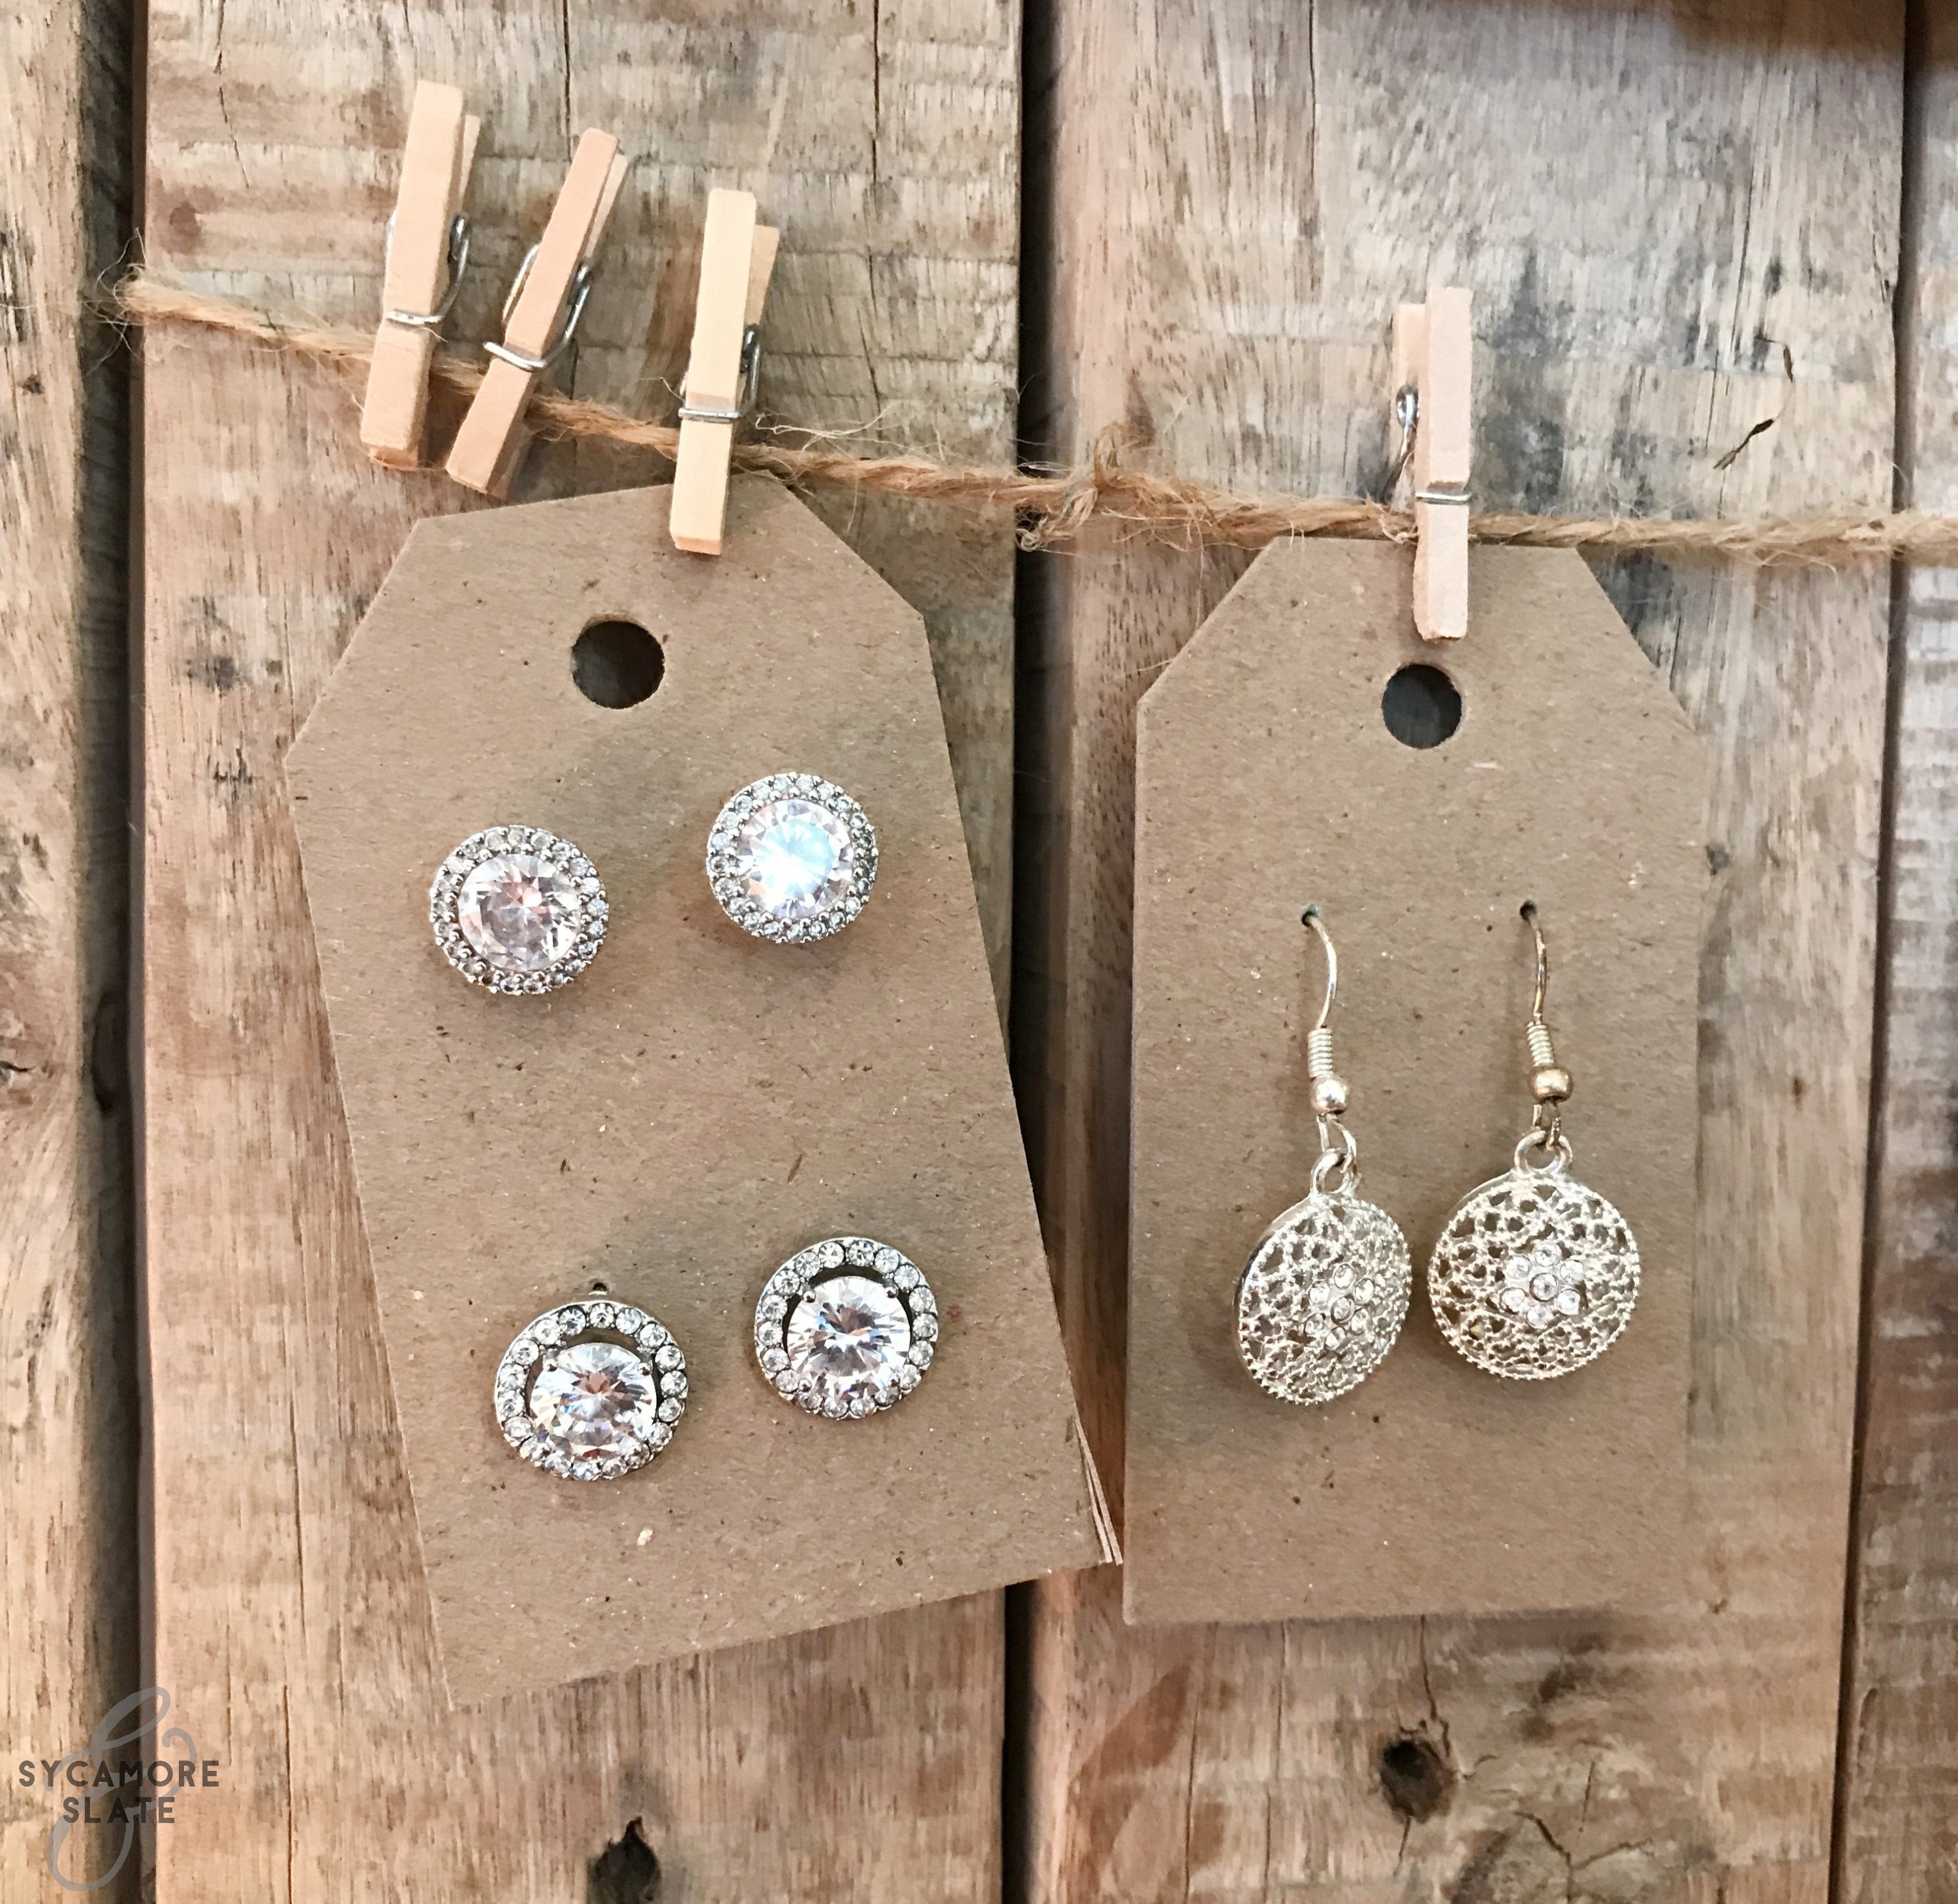
A hole at the top of the tag allows you to attach a string if you’d like. I played around with earring placement based on my own earring collection and ended up with four different layouts. An evenly spaced set of three, for smaller studs. An evenly spaced set of two, for larger studs. A single set, for long, dangling earrings. And another set of two, spaced farther apart to accommodate one
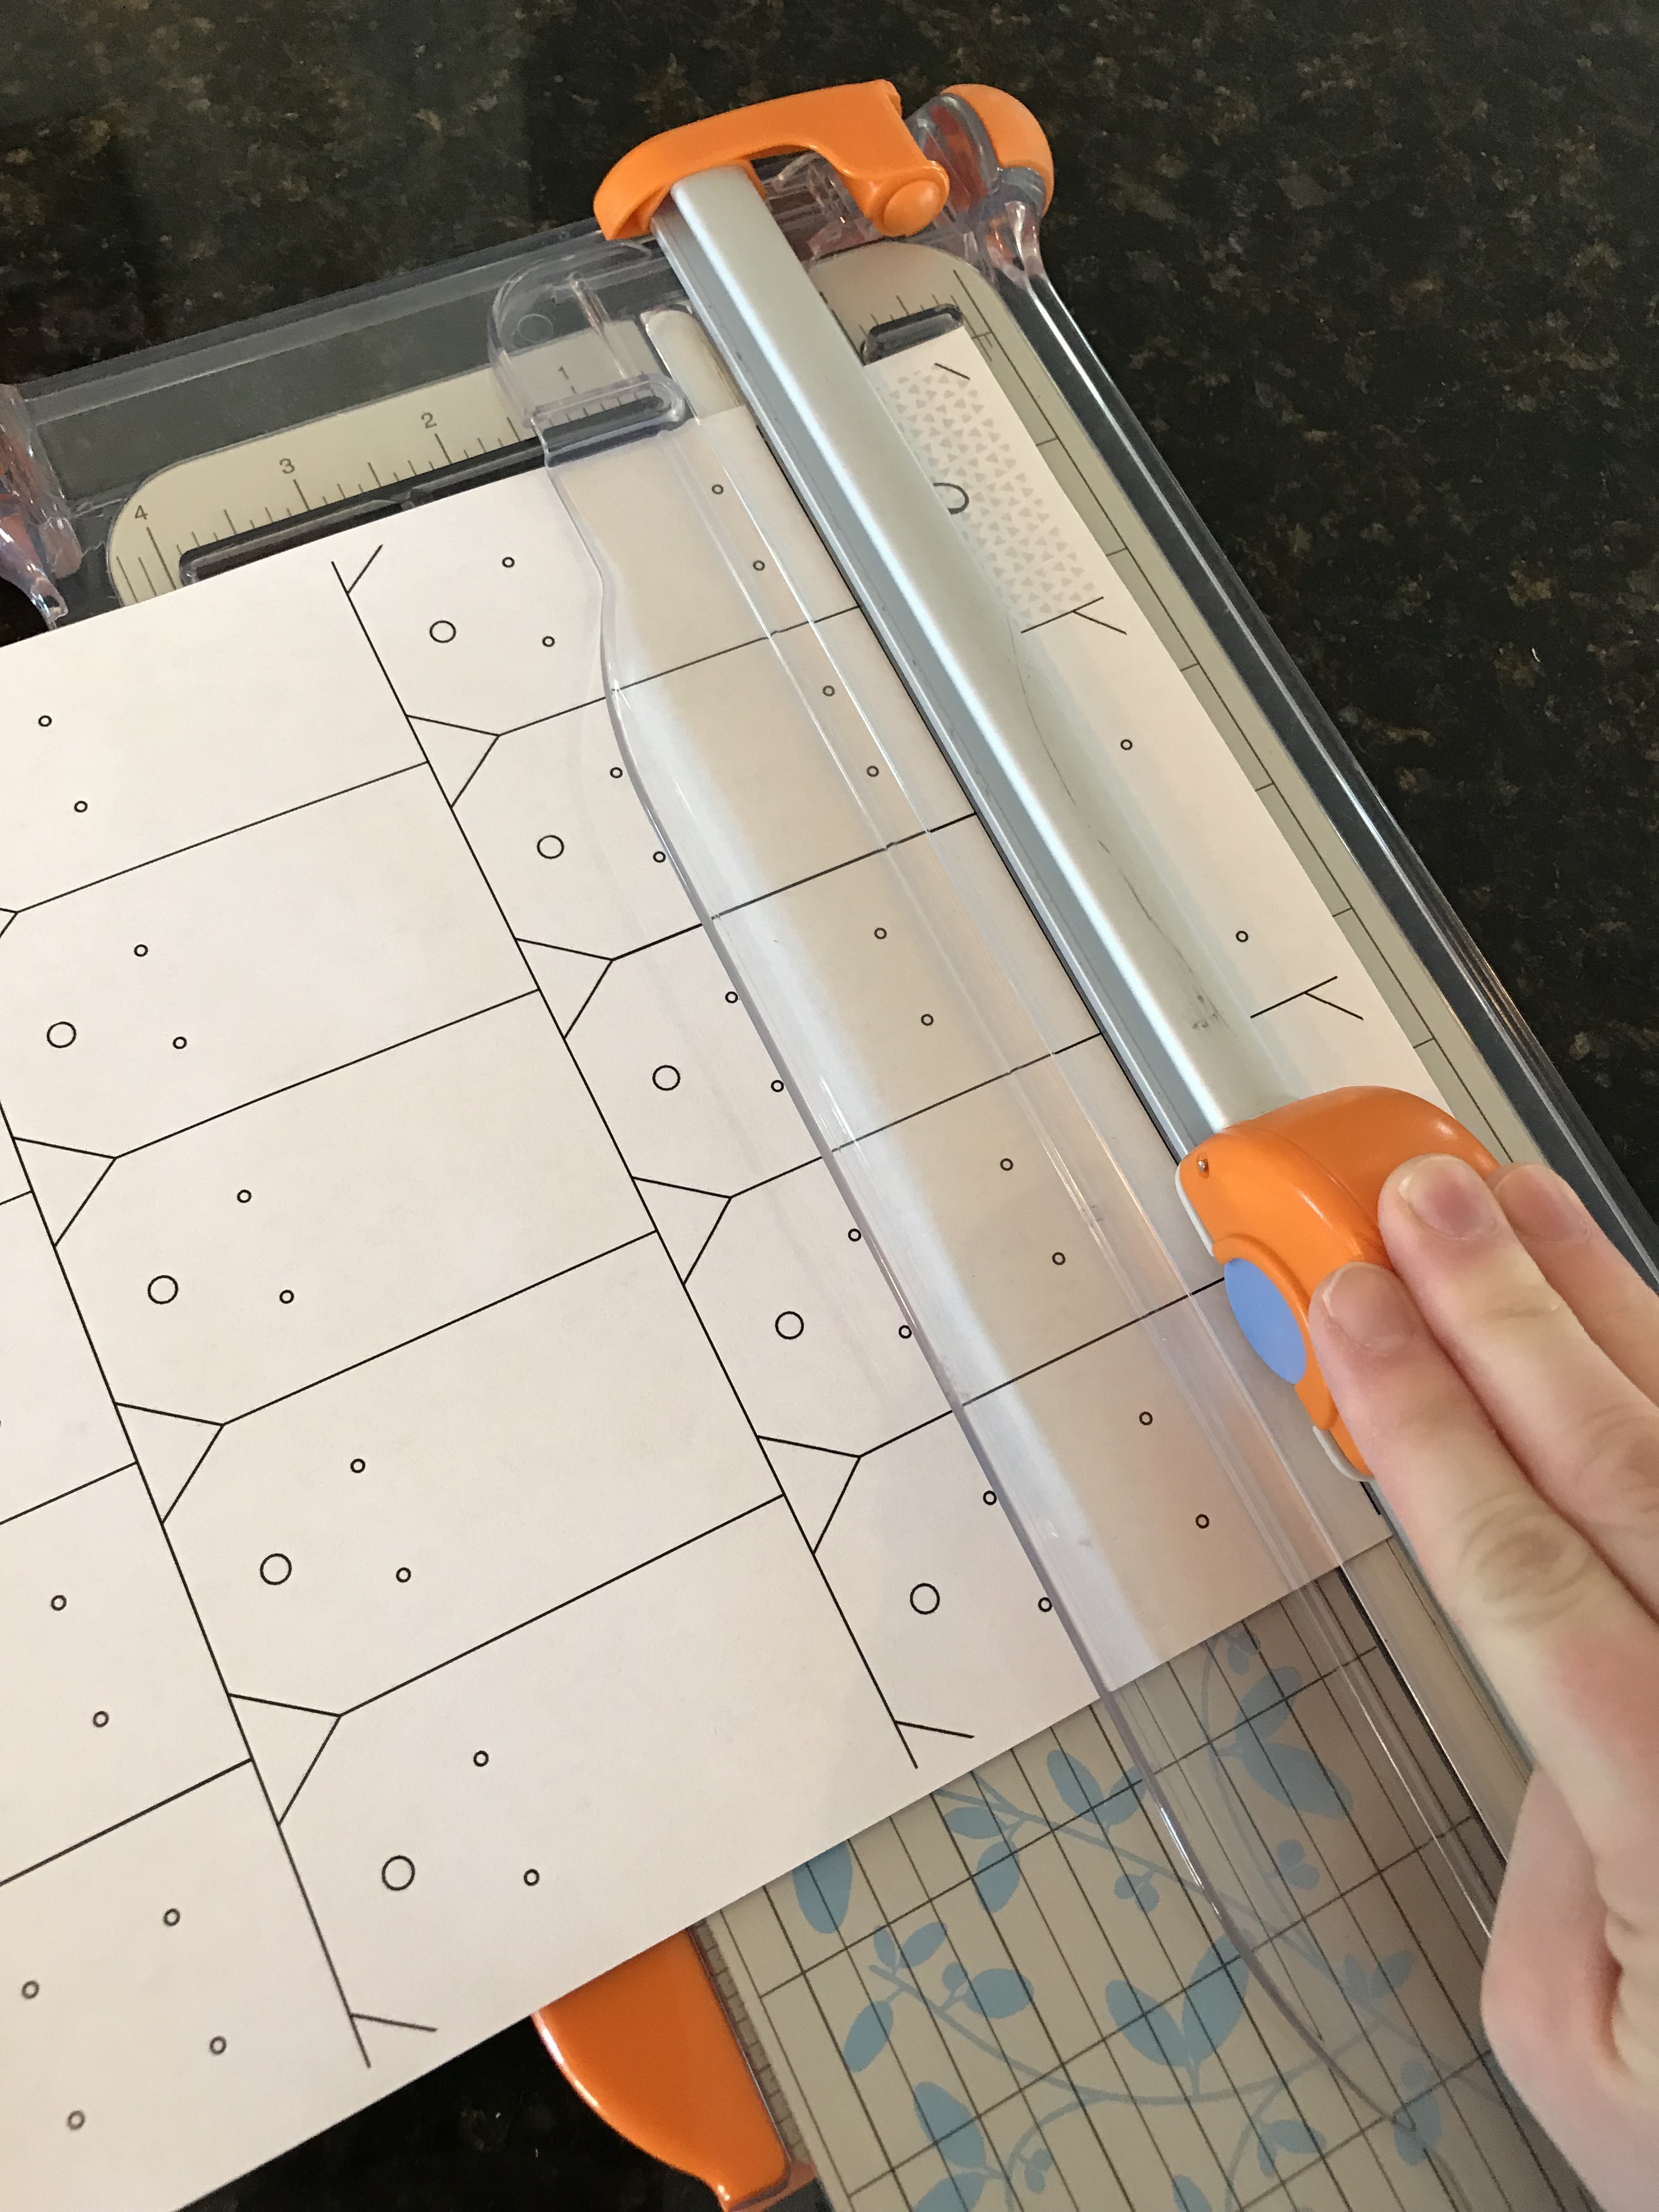
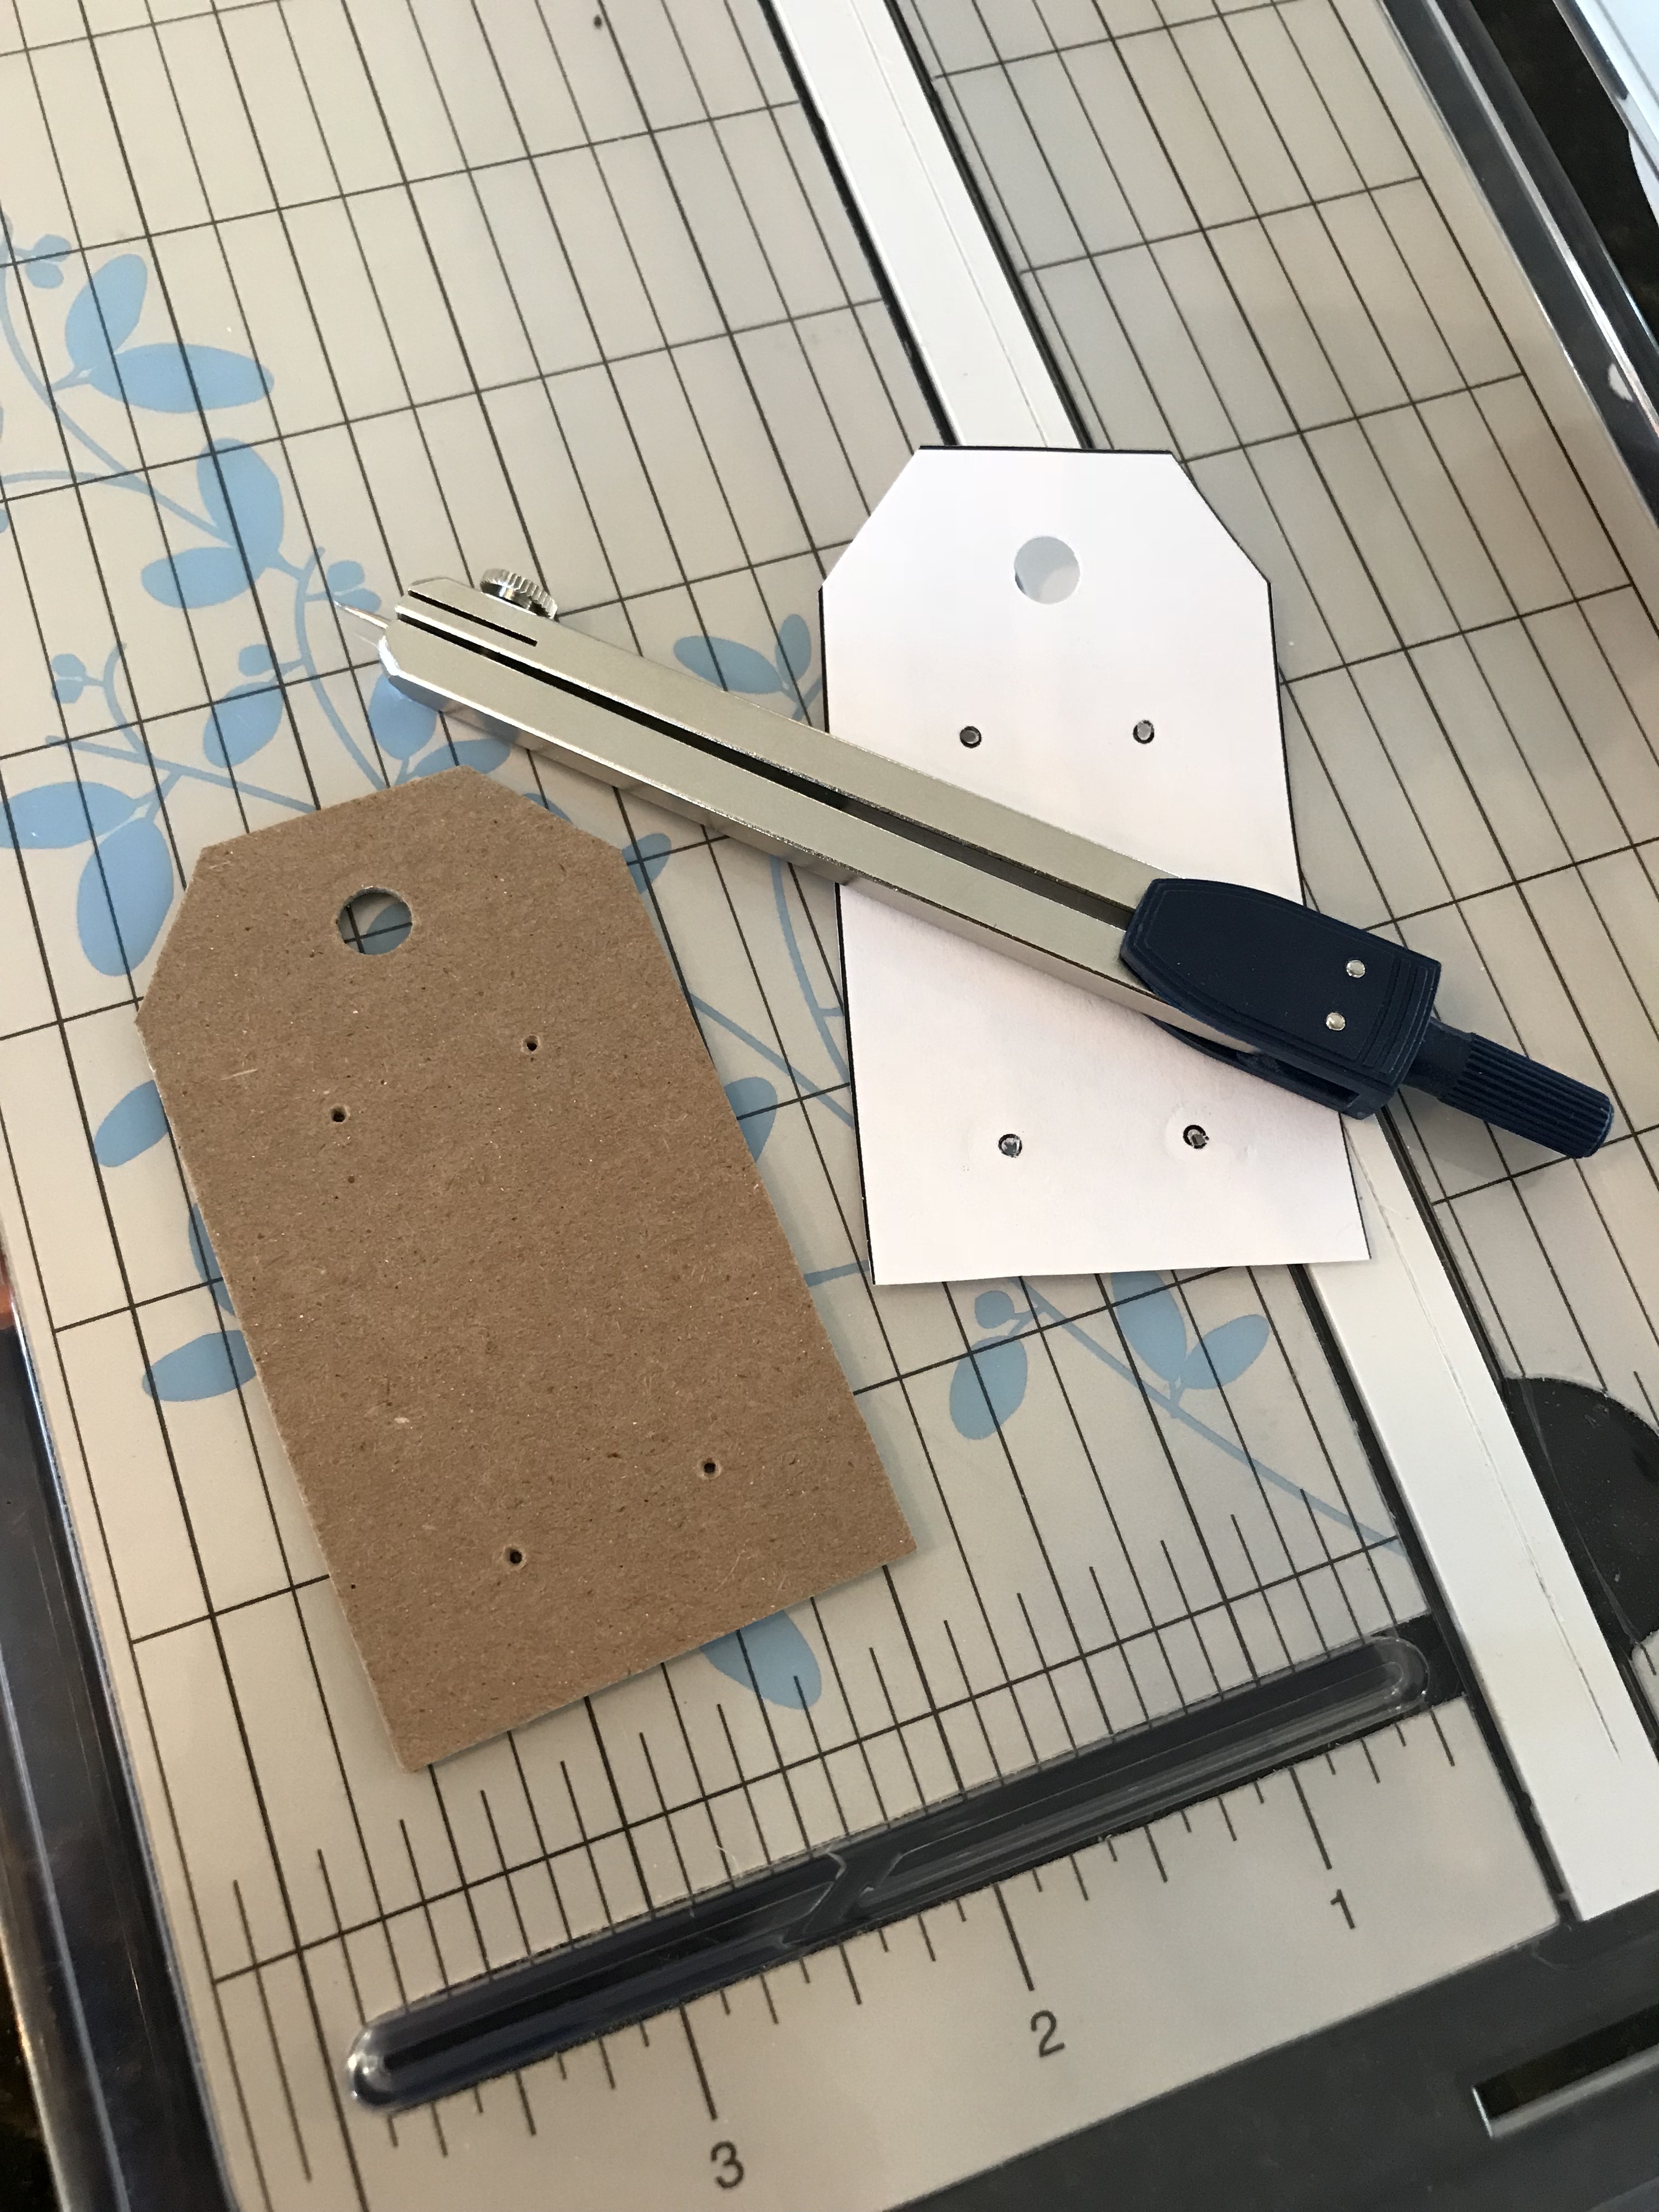
My intention was to use my Silhouette Cameo to cut the design directly out of chipboard (which is another item I already had on hand). The problem was, I’d never tried to cut chipboard on the Cameo before and it was a complete failure. The chipboard was just way, WAY too thick for the machine. I didn’t want to use a thinner material, though, because I really wanted these cards to be sturdy so I could use them for a long time and not have to worry about them tearing or bending.
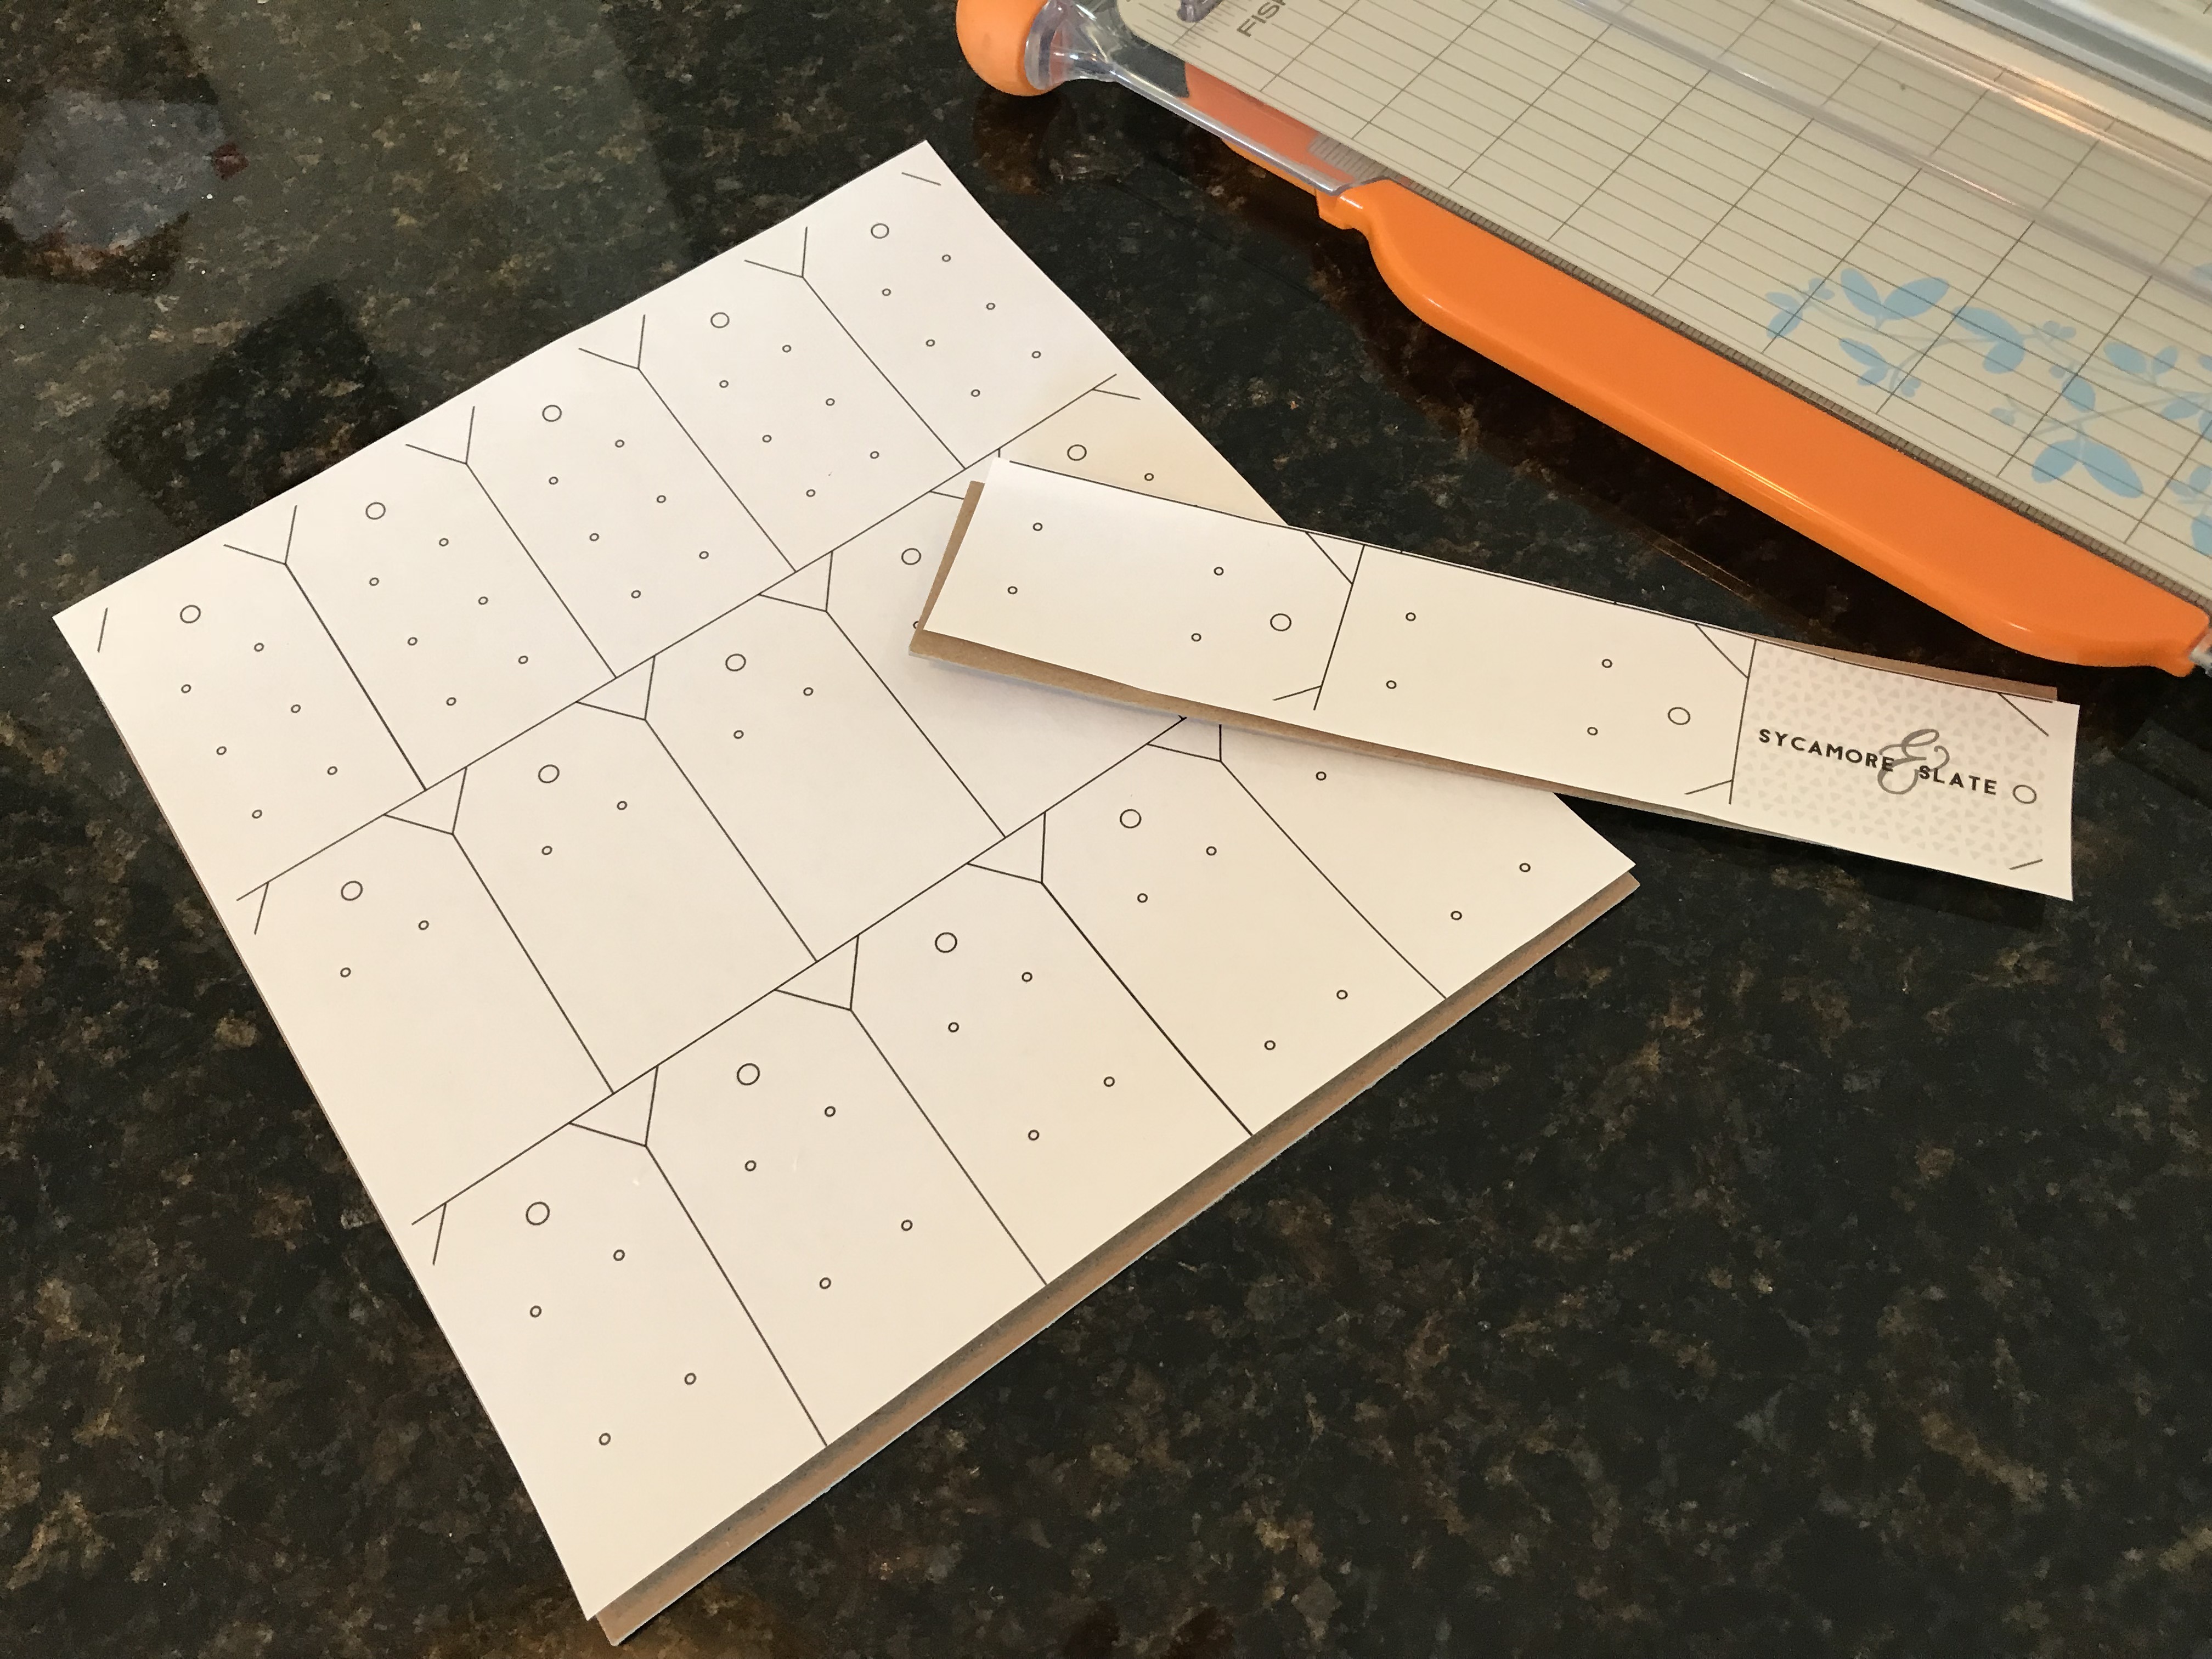
So I switched to plan B. I printed out my full sheet of tags on regular printer paper and then laid the printout on top of my chipboard as a stencil. I used my Fiskars Paper Trimmer to make the cuts, which did the job perfectly. Cutting it out was super easy; I just cut over the lines on the printout.
I LOVE that trimmer and cannot tell you how many times I’ve used it over the years. It was one of those items I didn’t think I’d really need very often, but I seriously use it ALL the time. If you don’t have a cutter like that, though, you could also probably use sharp, heavy-duty scissors and hand-cut it. But seriously, just go buy yourself a trimmer!!
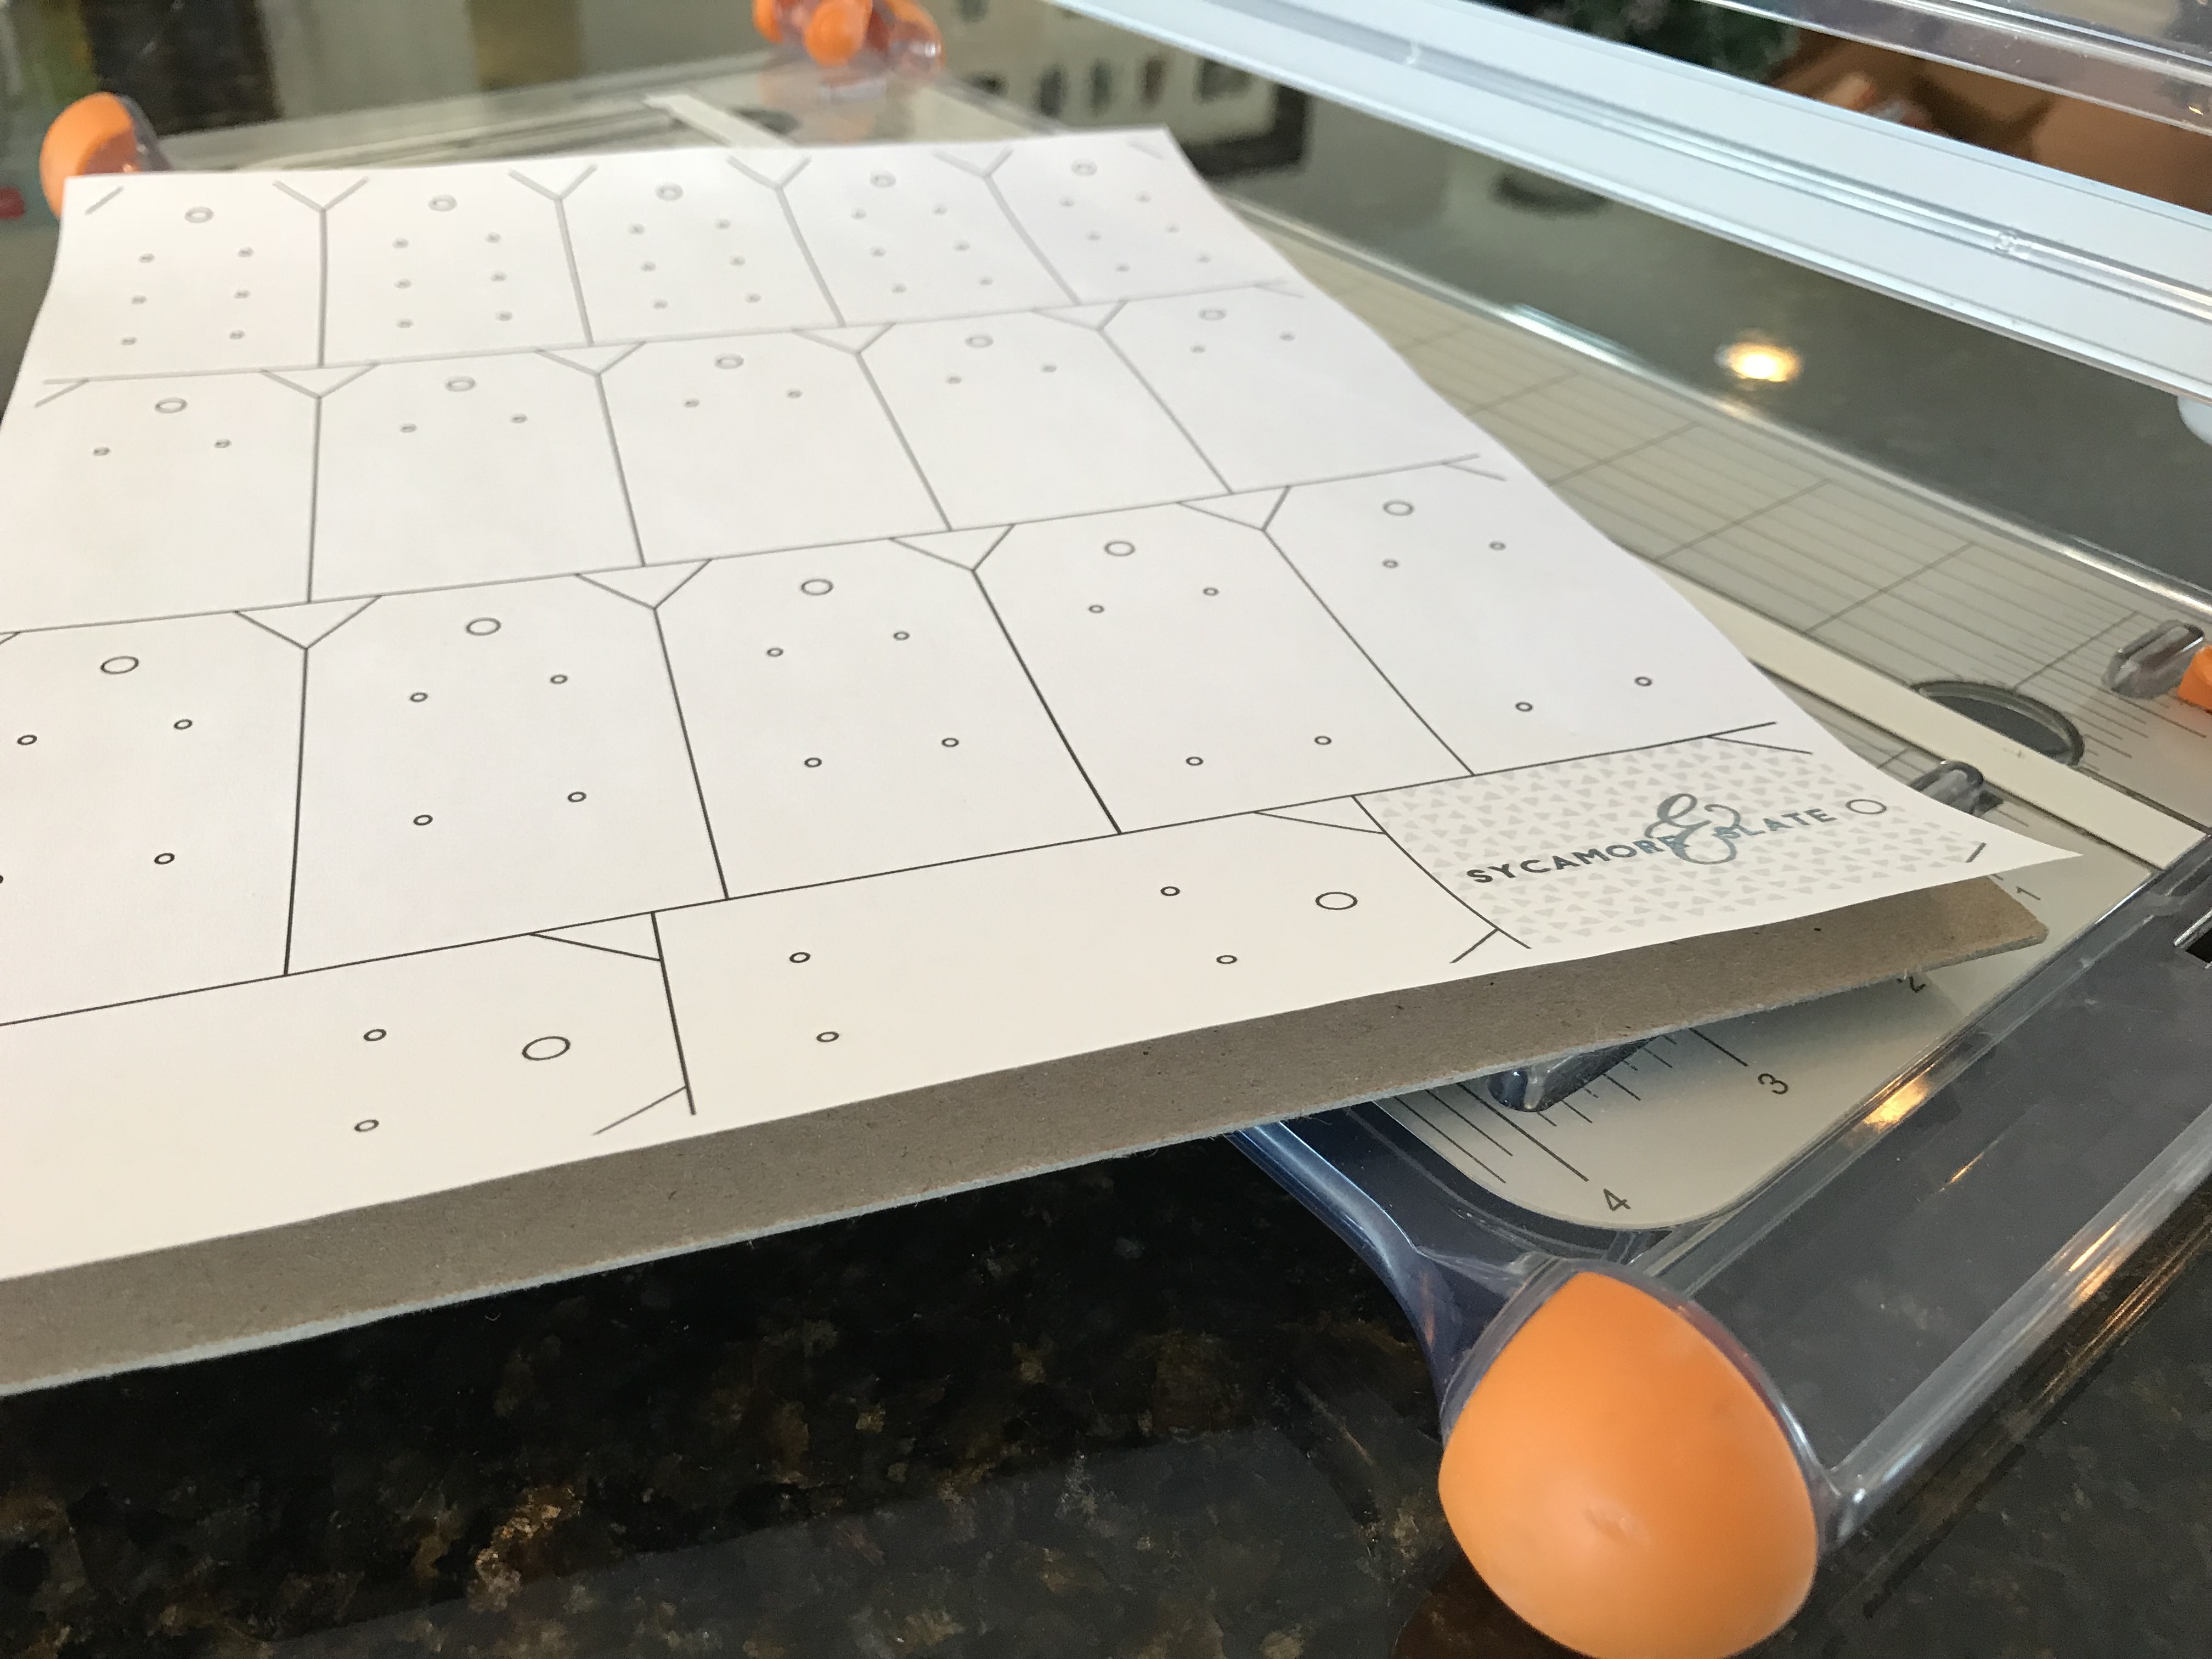
My printer didn’t print the lines around the margins of the paper because they were too close to the edge. I didn’t even worry about cutting those since they were so close to the edge anyway. It really made no difference in the end and I couldn’t even tell that those tags were a tiny bit bigger. If you want to avoid this, you can check the box “fit to page” after you click the print button on the pdf. That will automatically shrink the page down so that all the lines will print. It will also mean your earring tags will be slightly smaller.
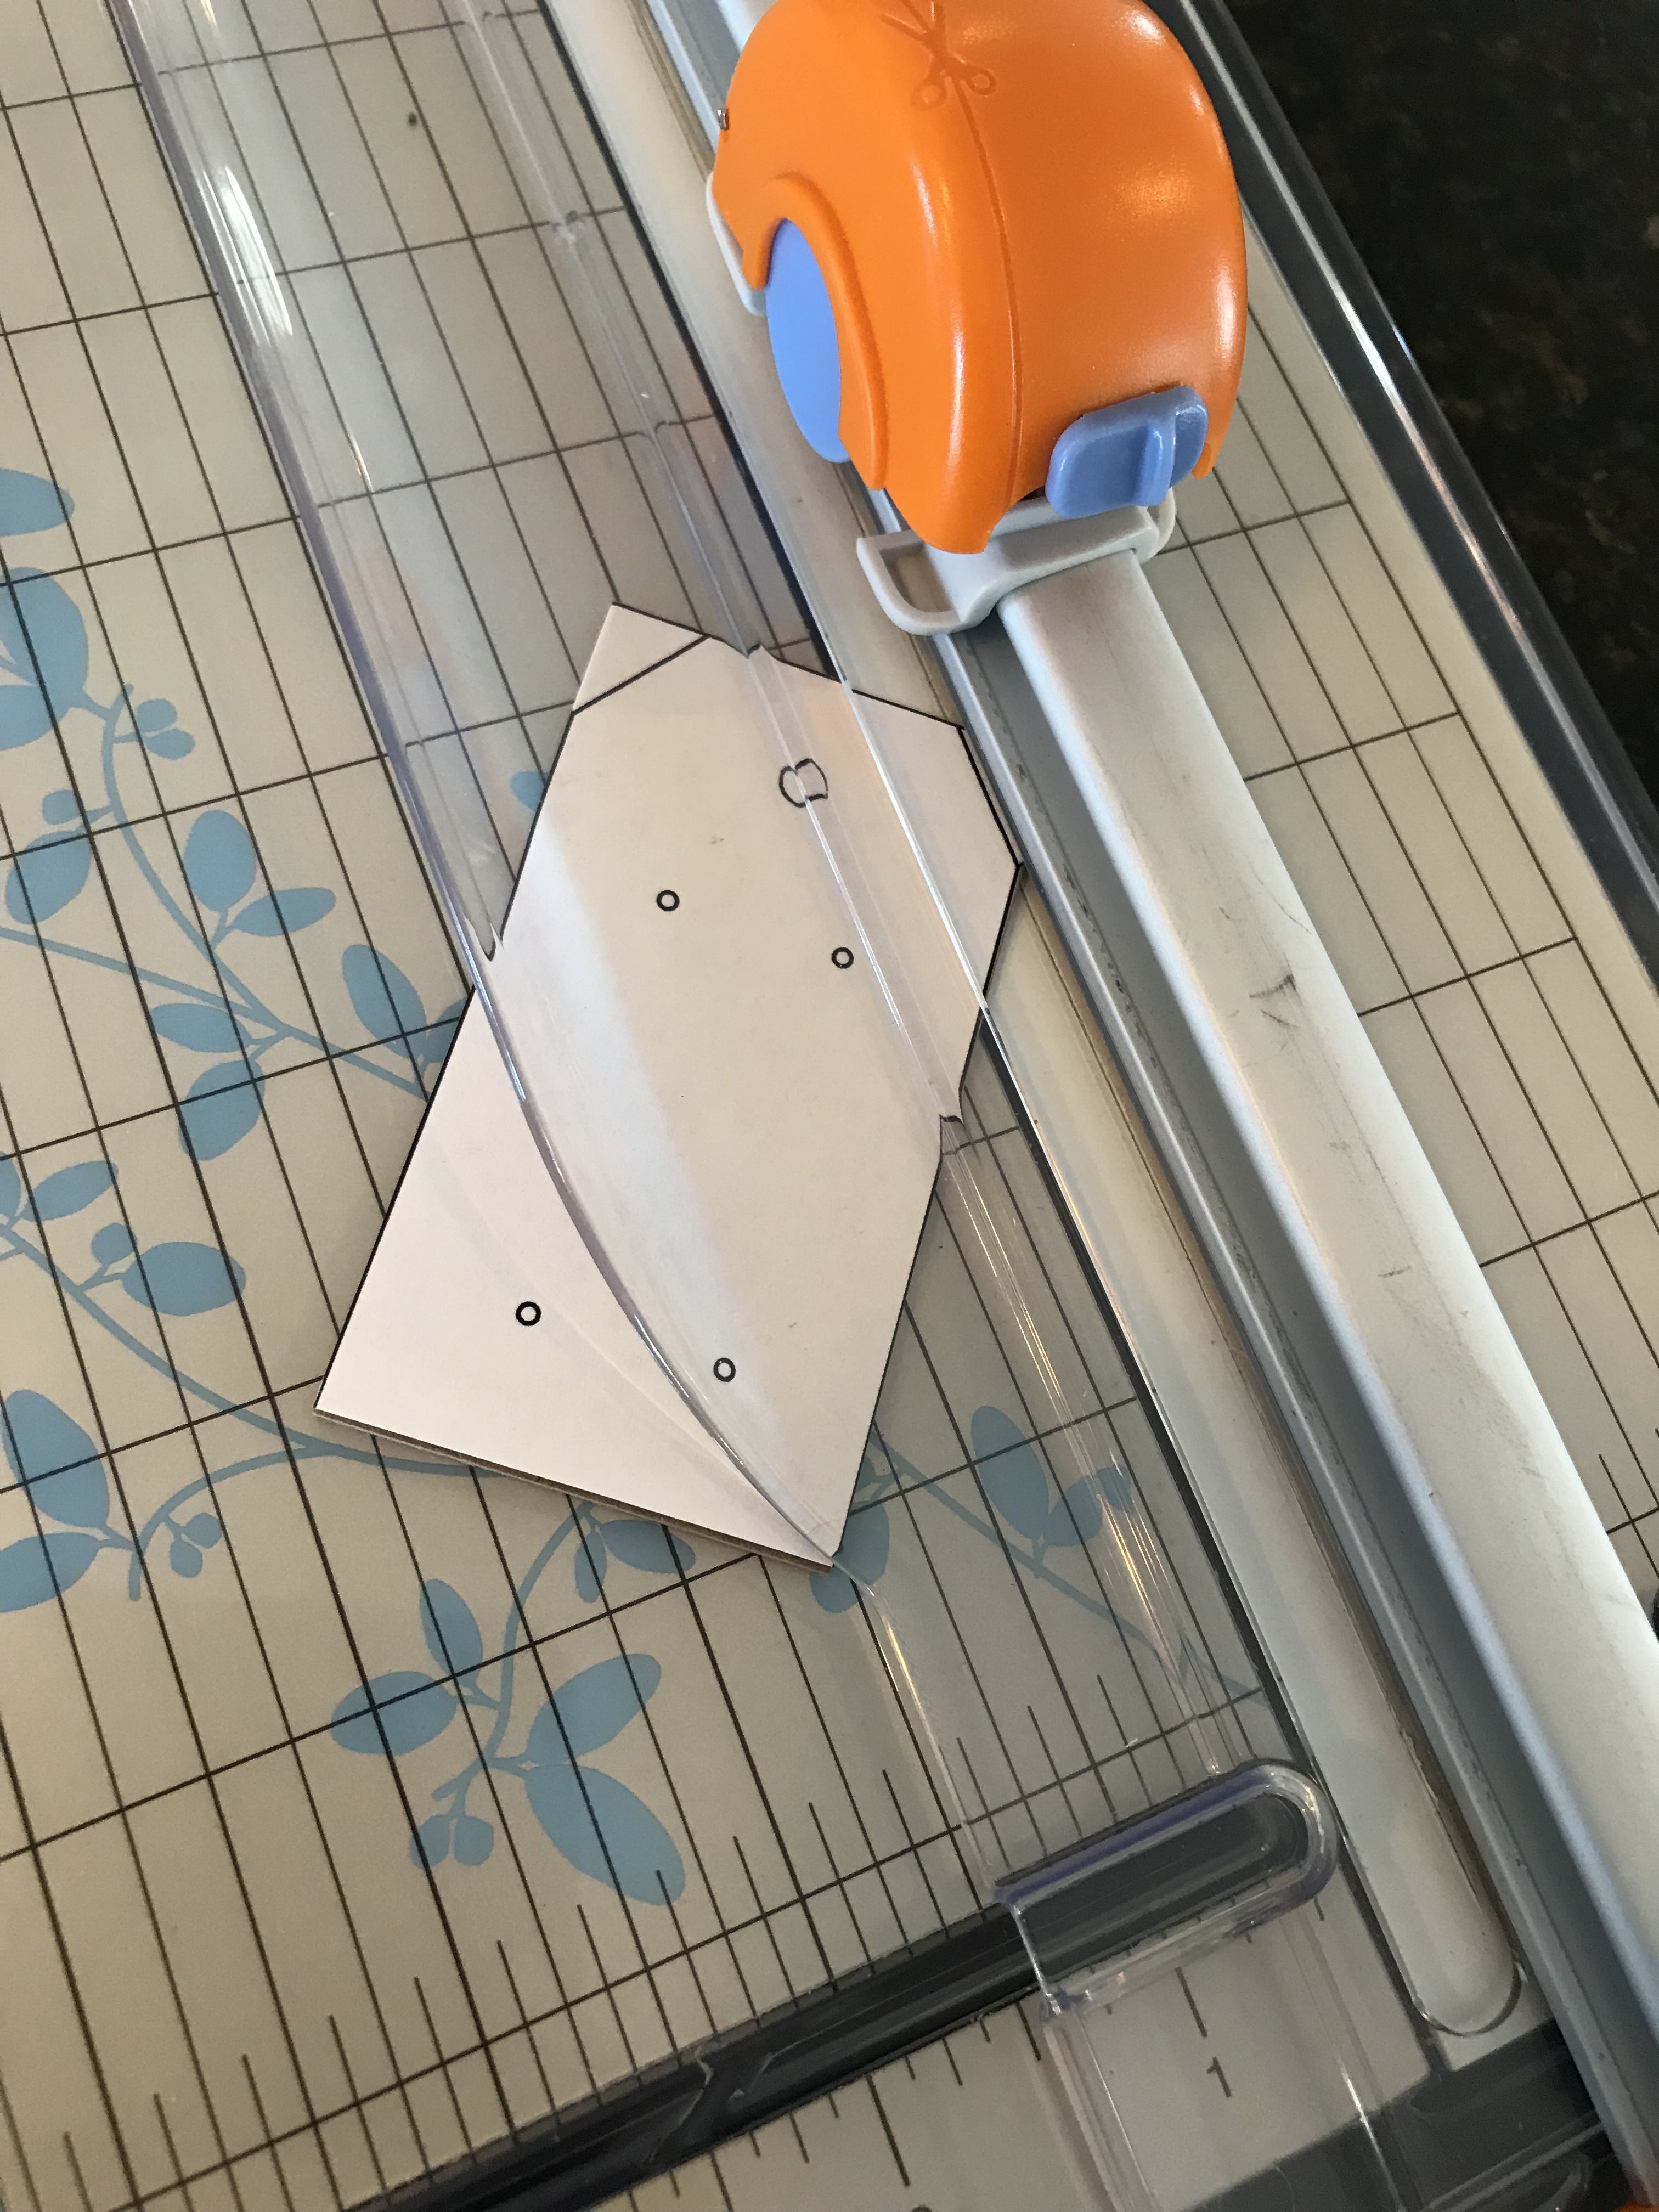
After the tags were all cut out, I grabbed my single hole punch. I prefer This style because you can easily see where you are punching the hole to make sure it’s lined up properly. Double check that your printout is lined up properly with the chipboard, and go ahead and punch out those holes!
NOTE: The hole punch should only be used on the holes at the top of the tags to hang a string from. Do not use it to punch the smaller earring holes!
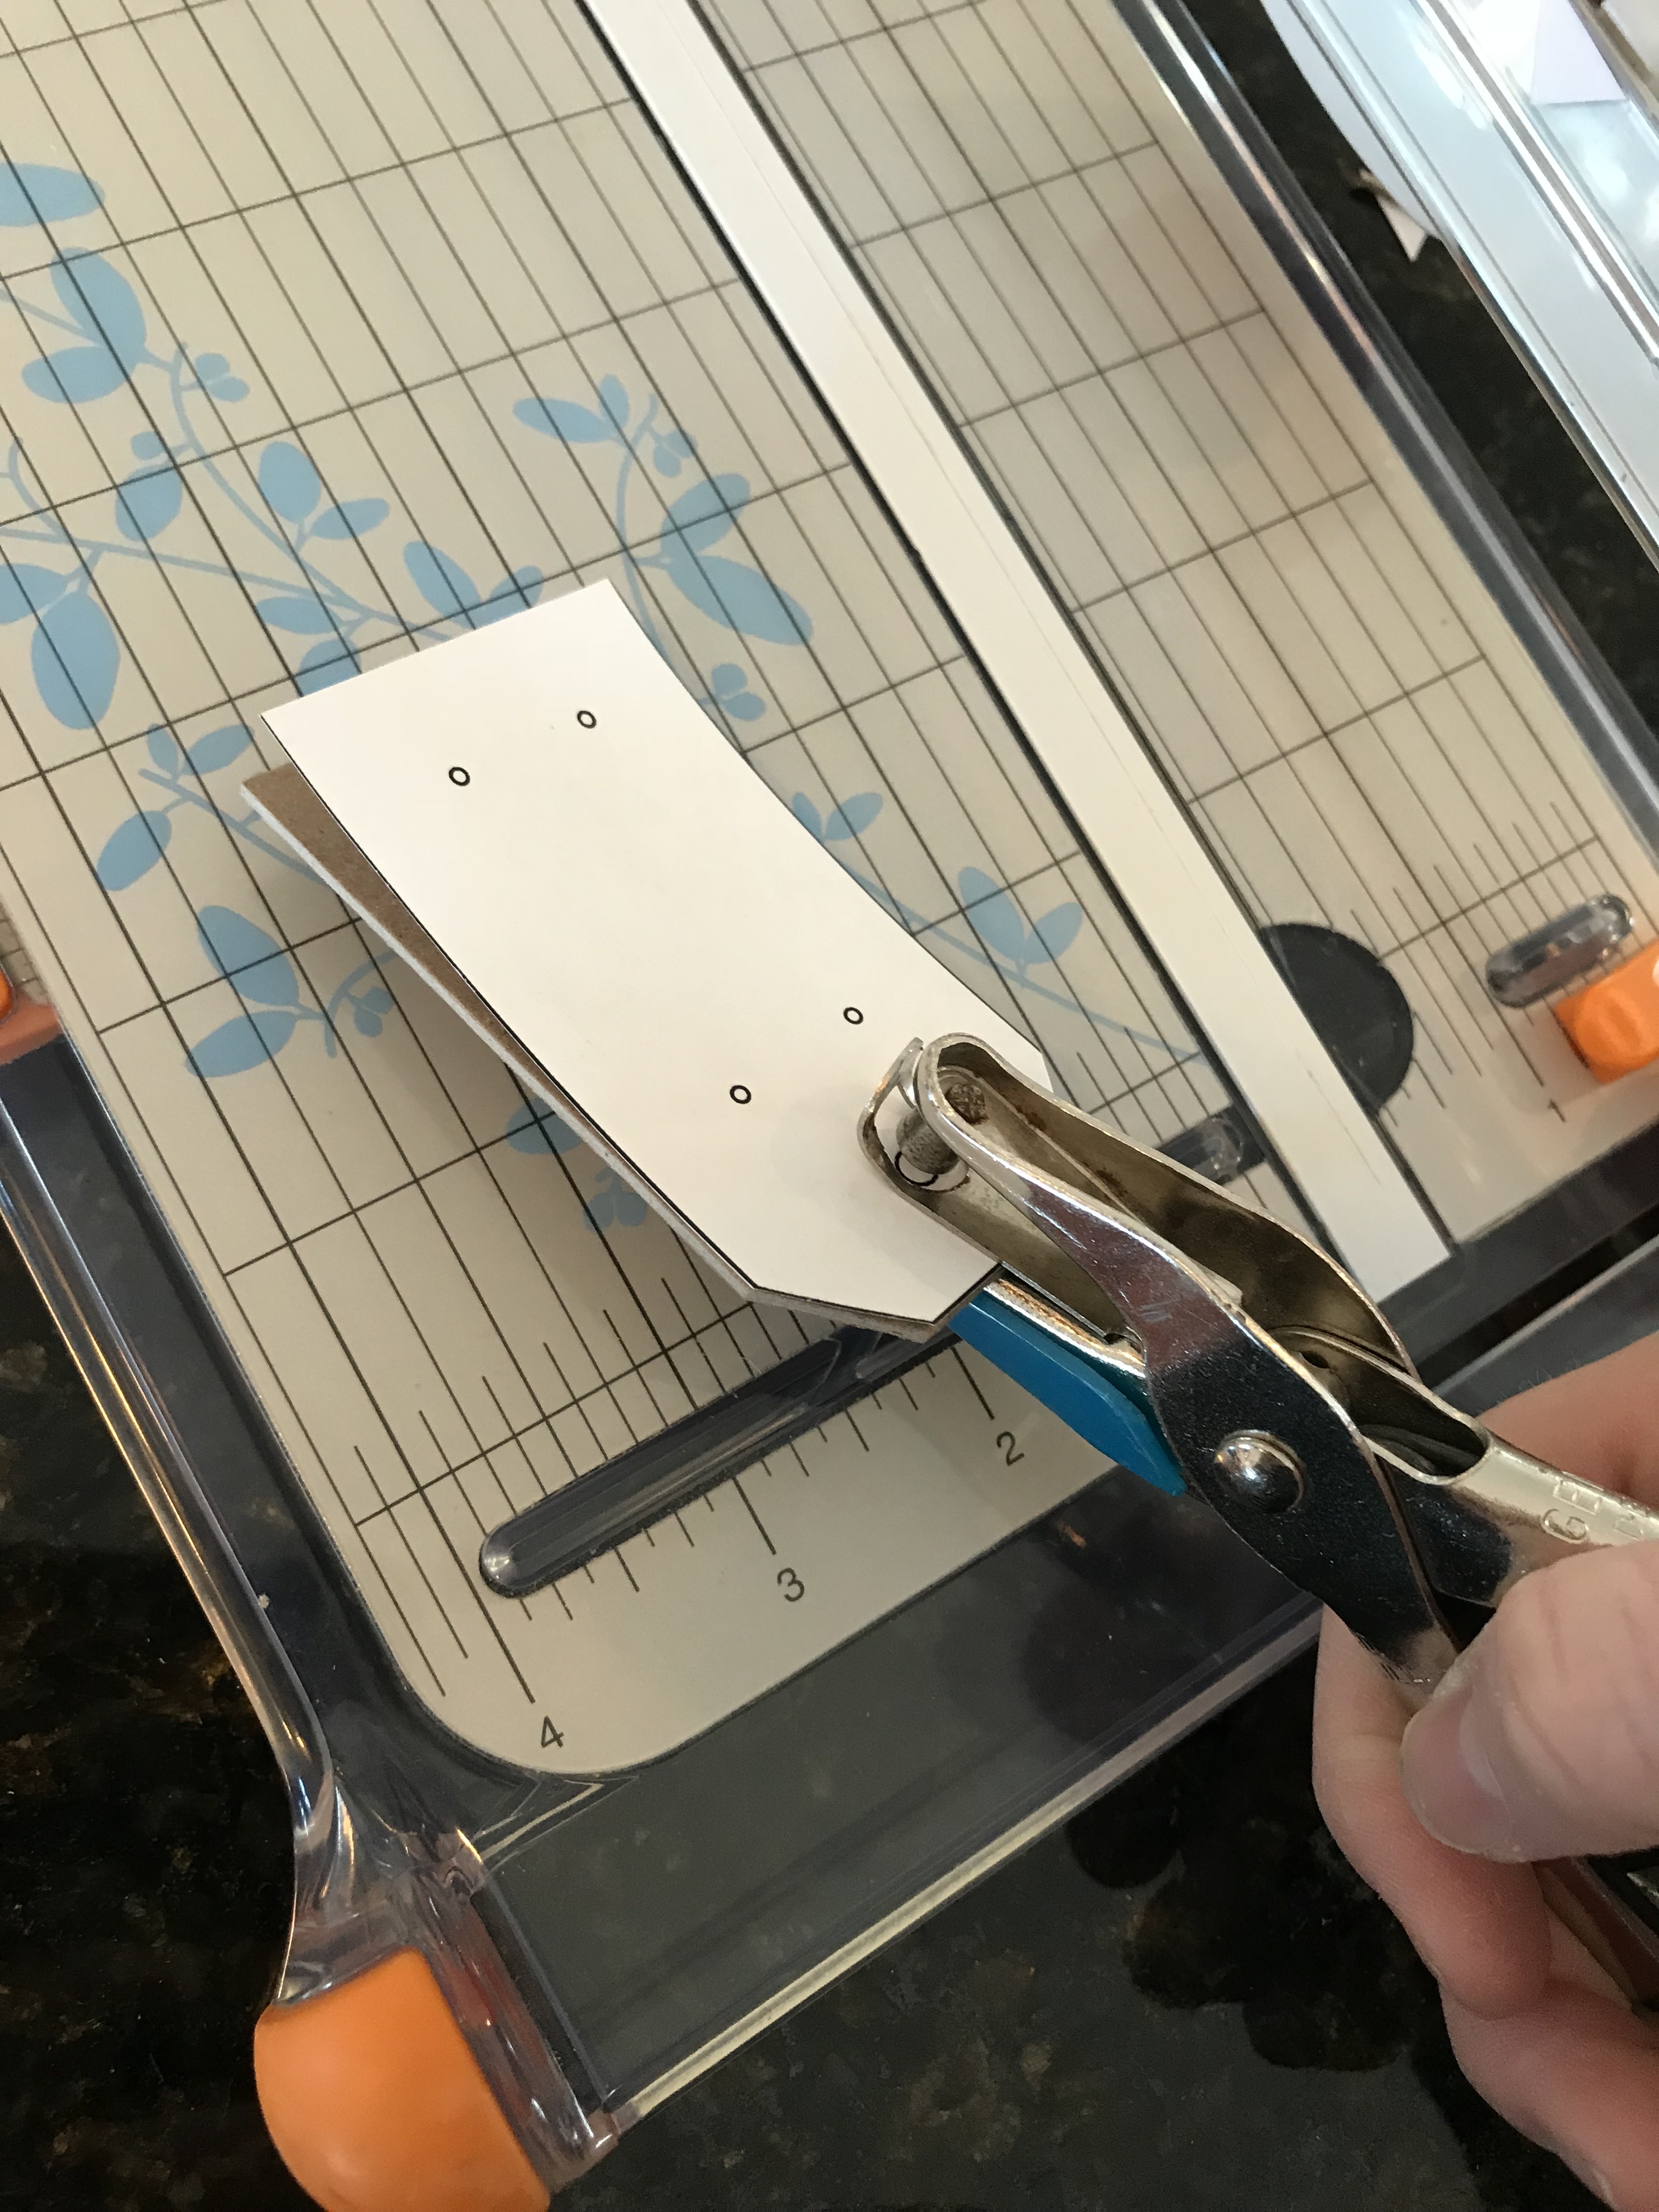
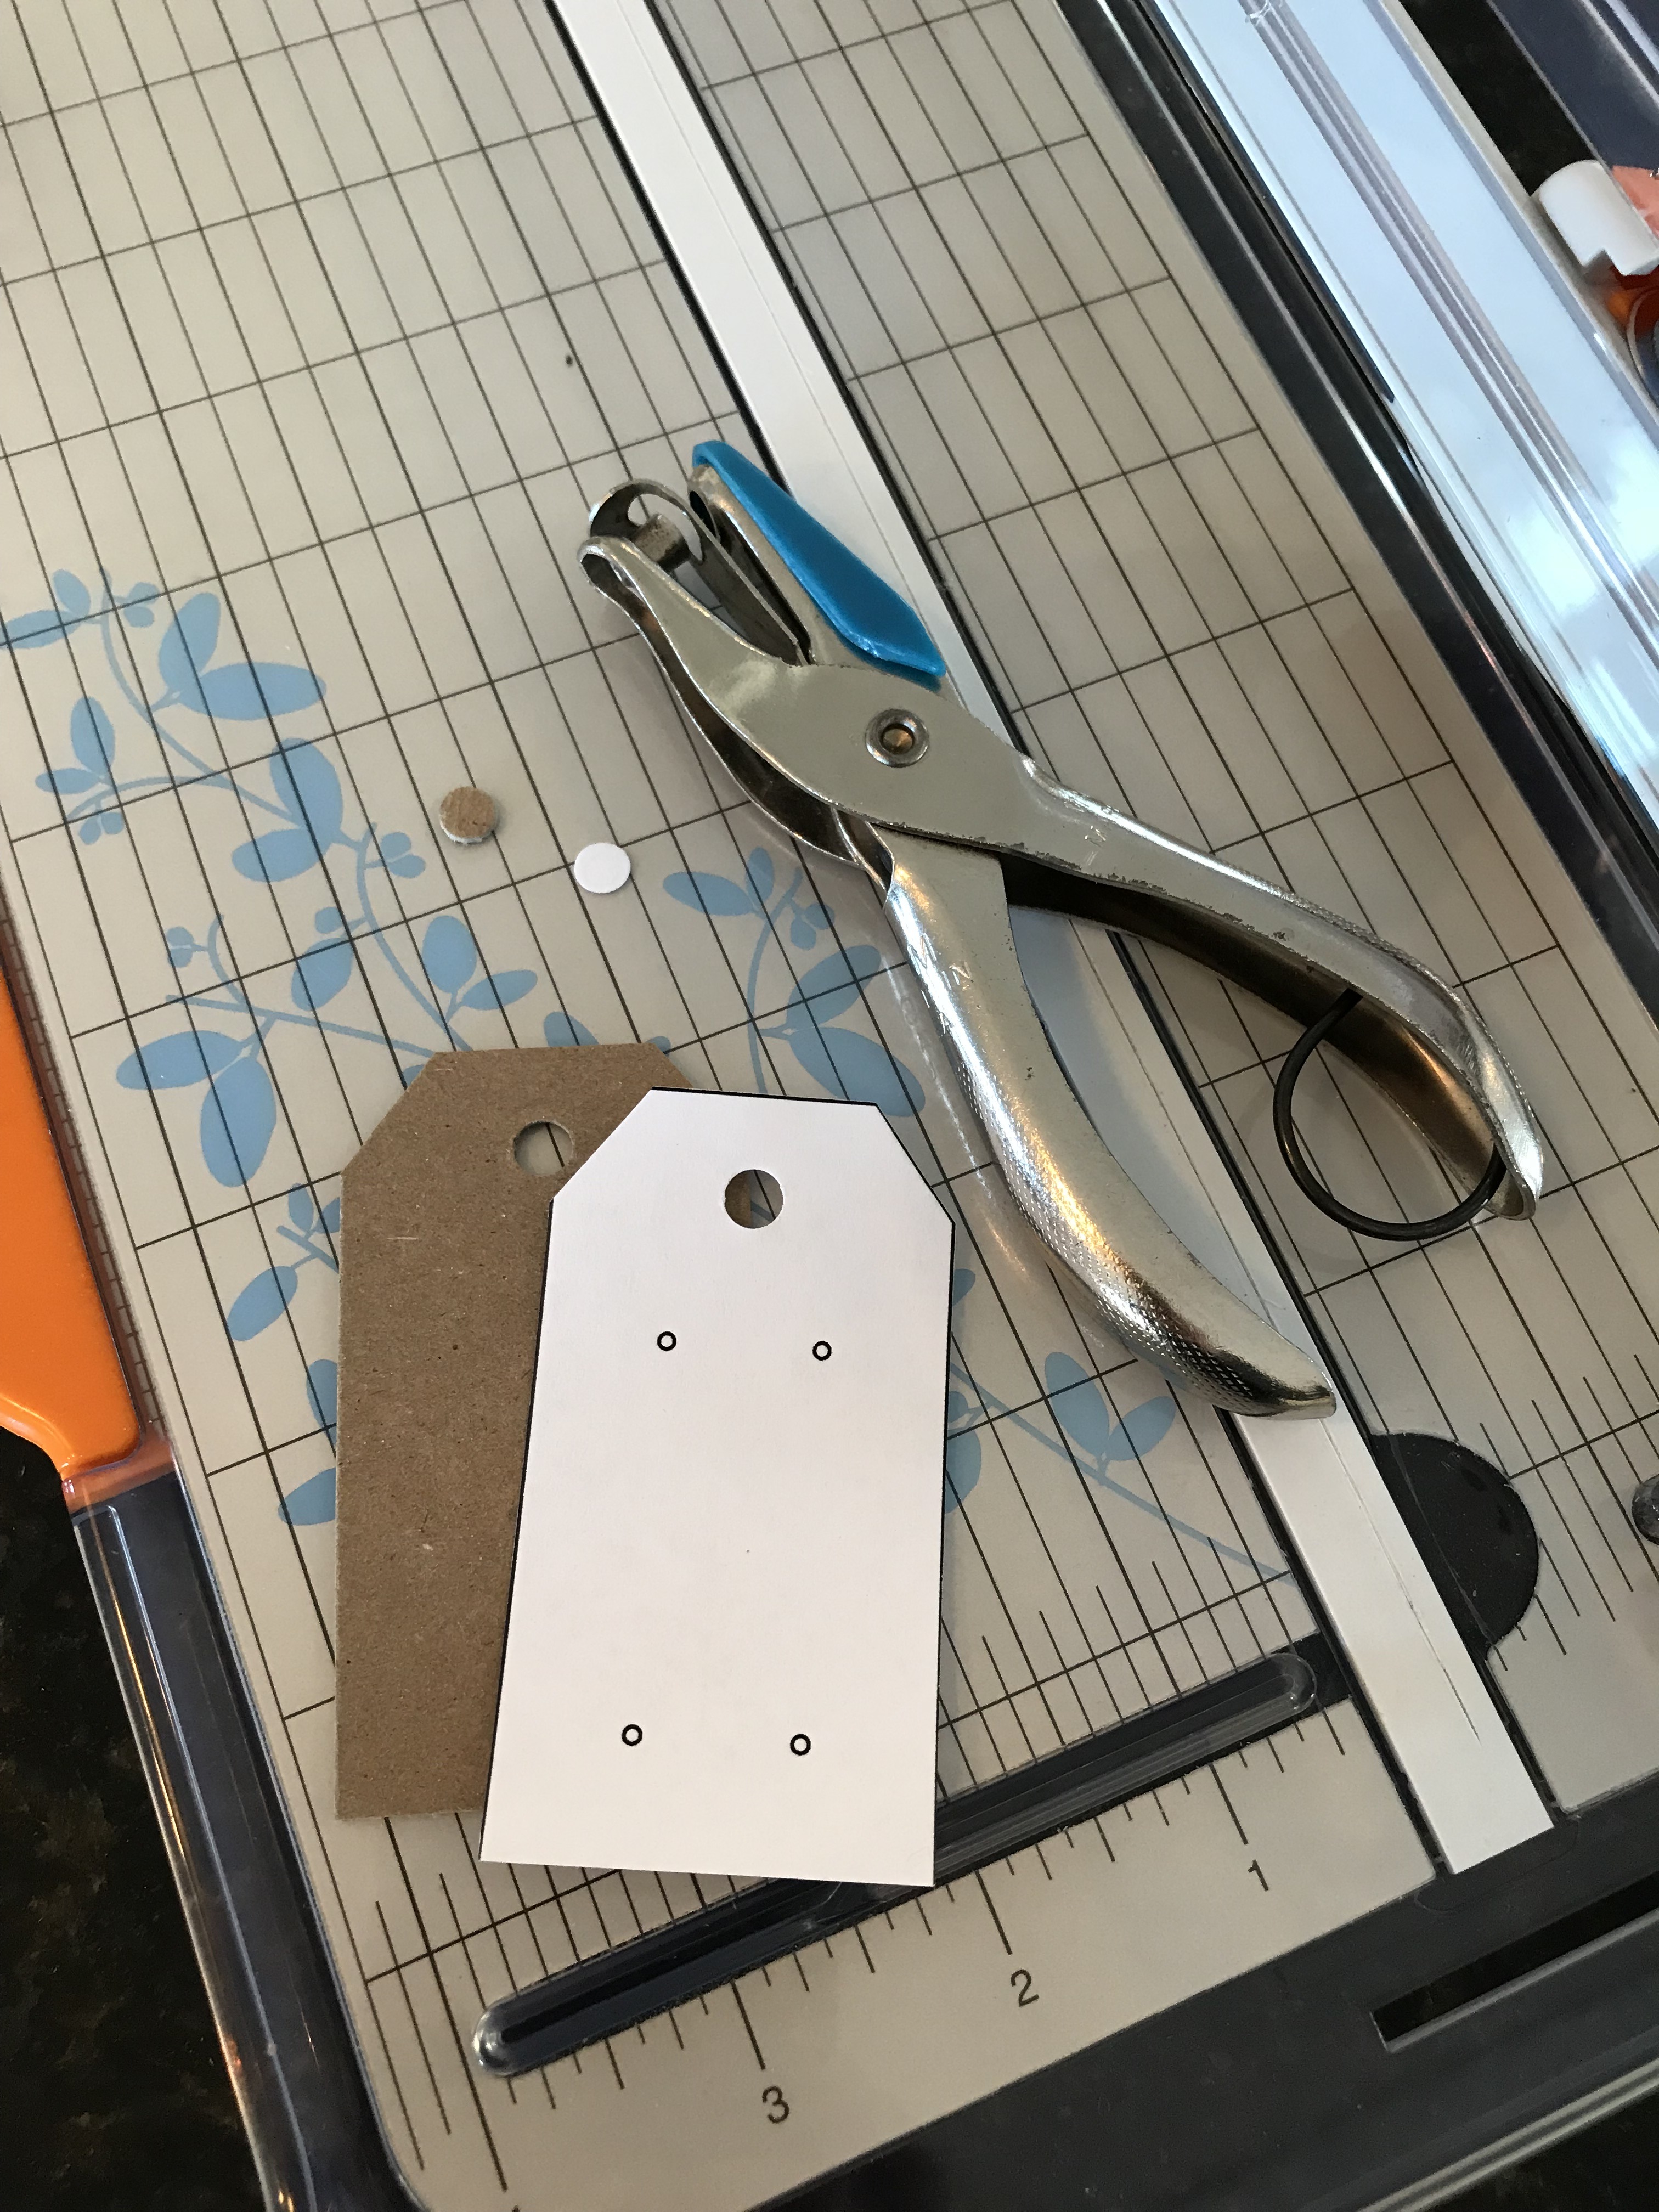
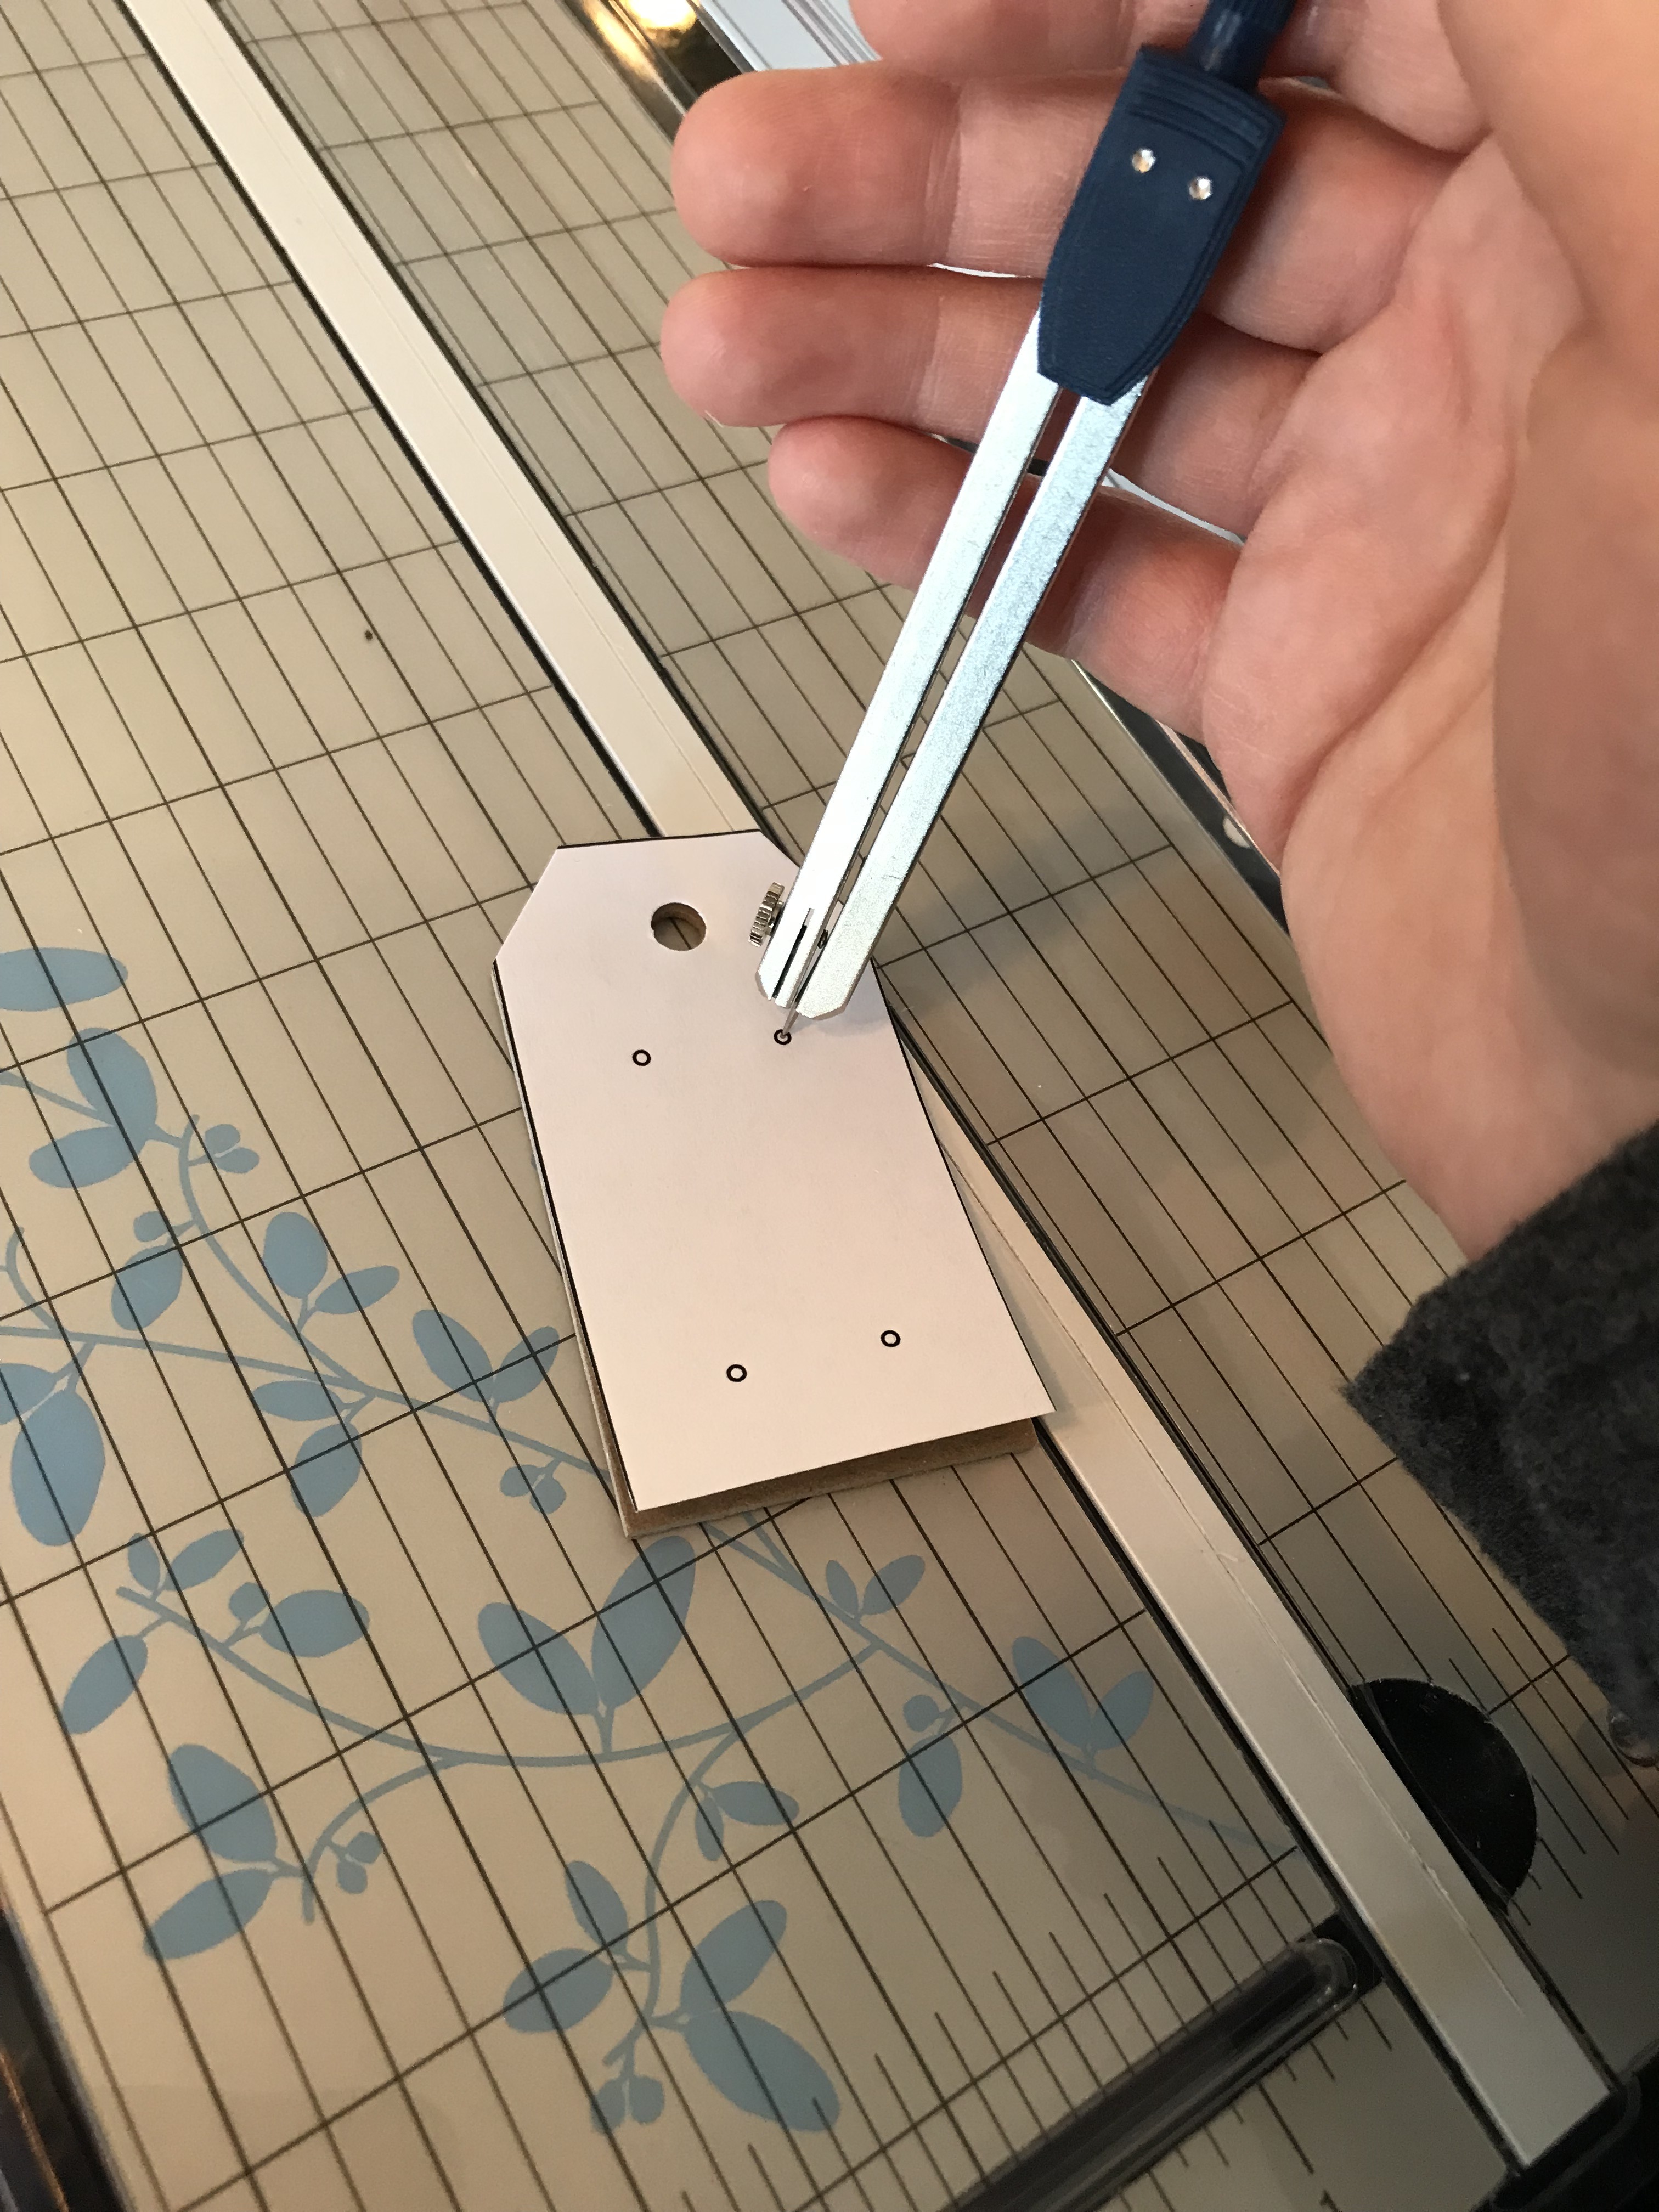
To punch out the earring holes, I used a compass tool which had a very sharp point on the end that I was able to pierce through the chipboard with. If you have an awl like this one or even a Xacto knife, those would both work, as well. Again, make sure your stencil is lined up correctly before you punch your holes.
NOTE: Make sure you put something underneath the tags when you punch them, so you don’t damage your working surface. A magazine would be a good option.
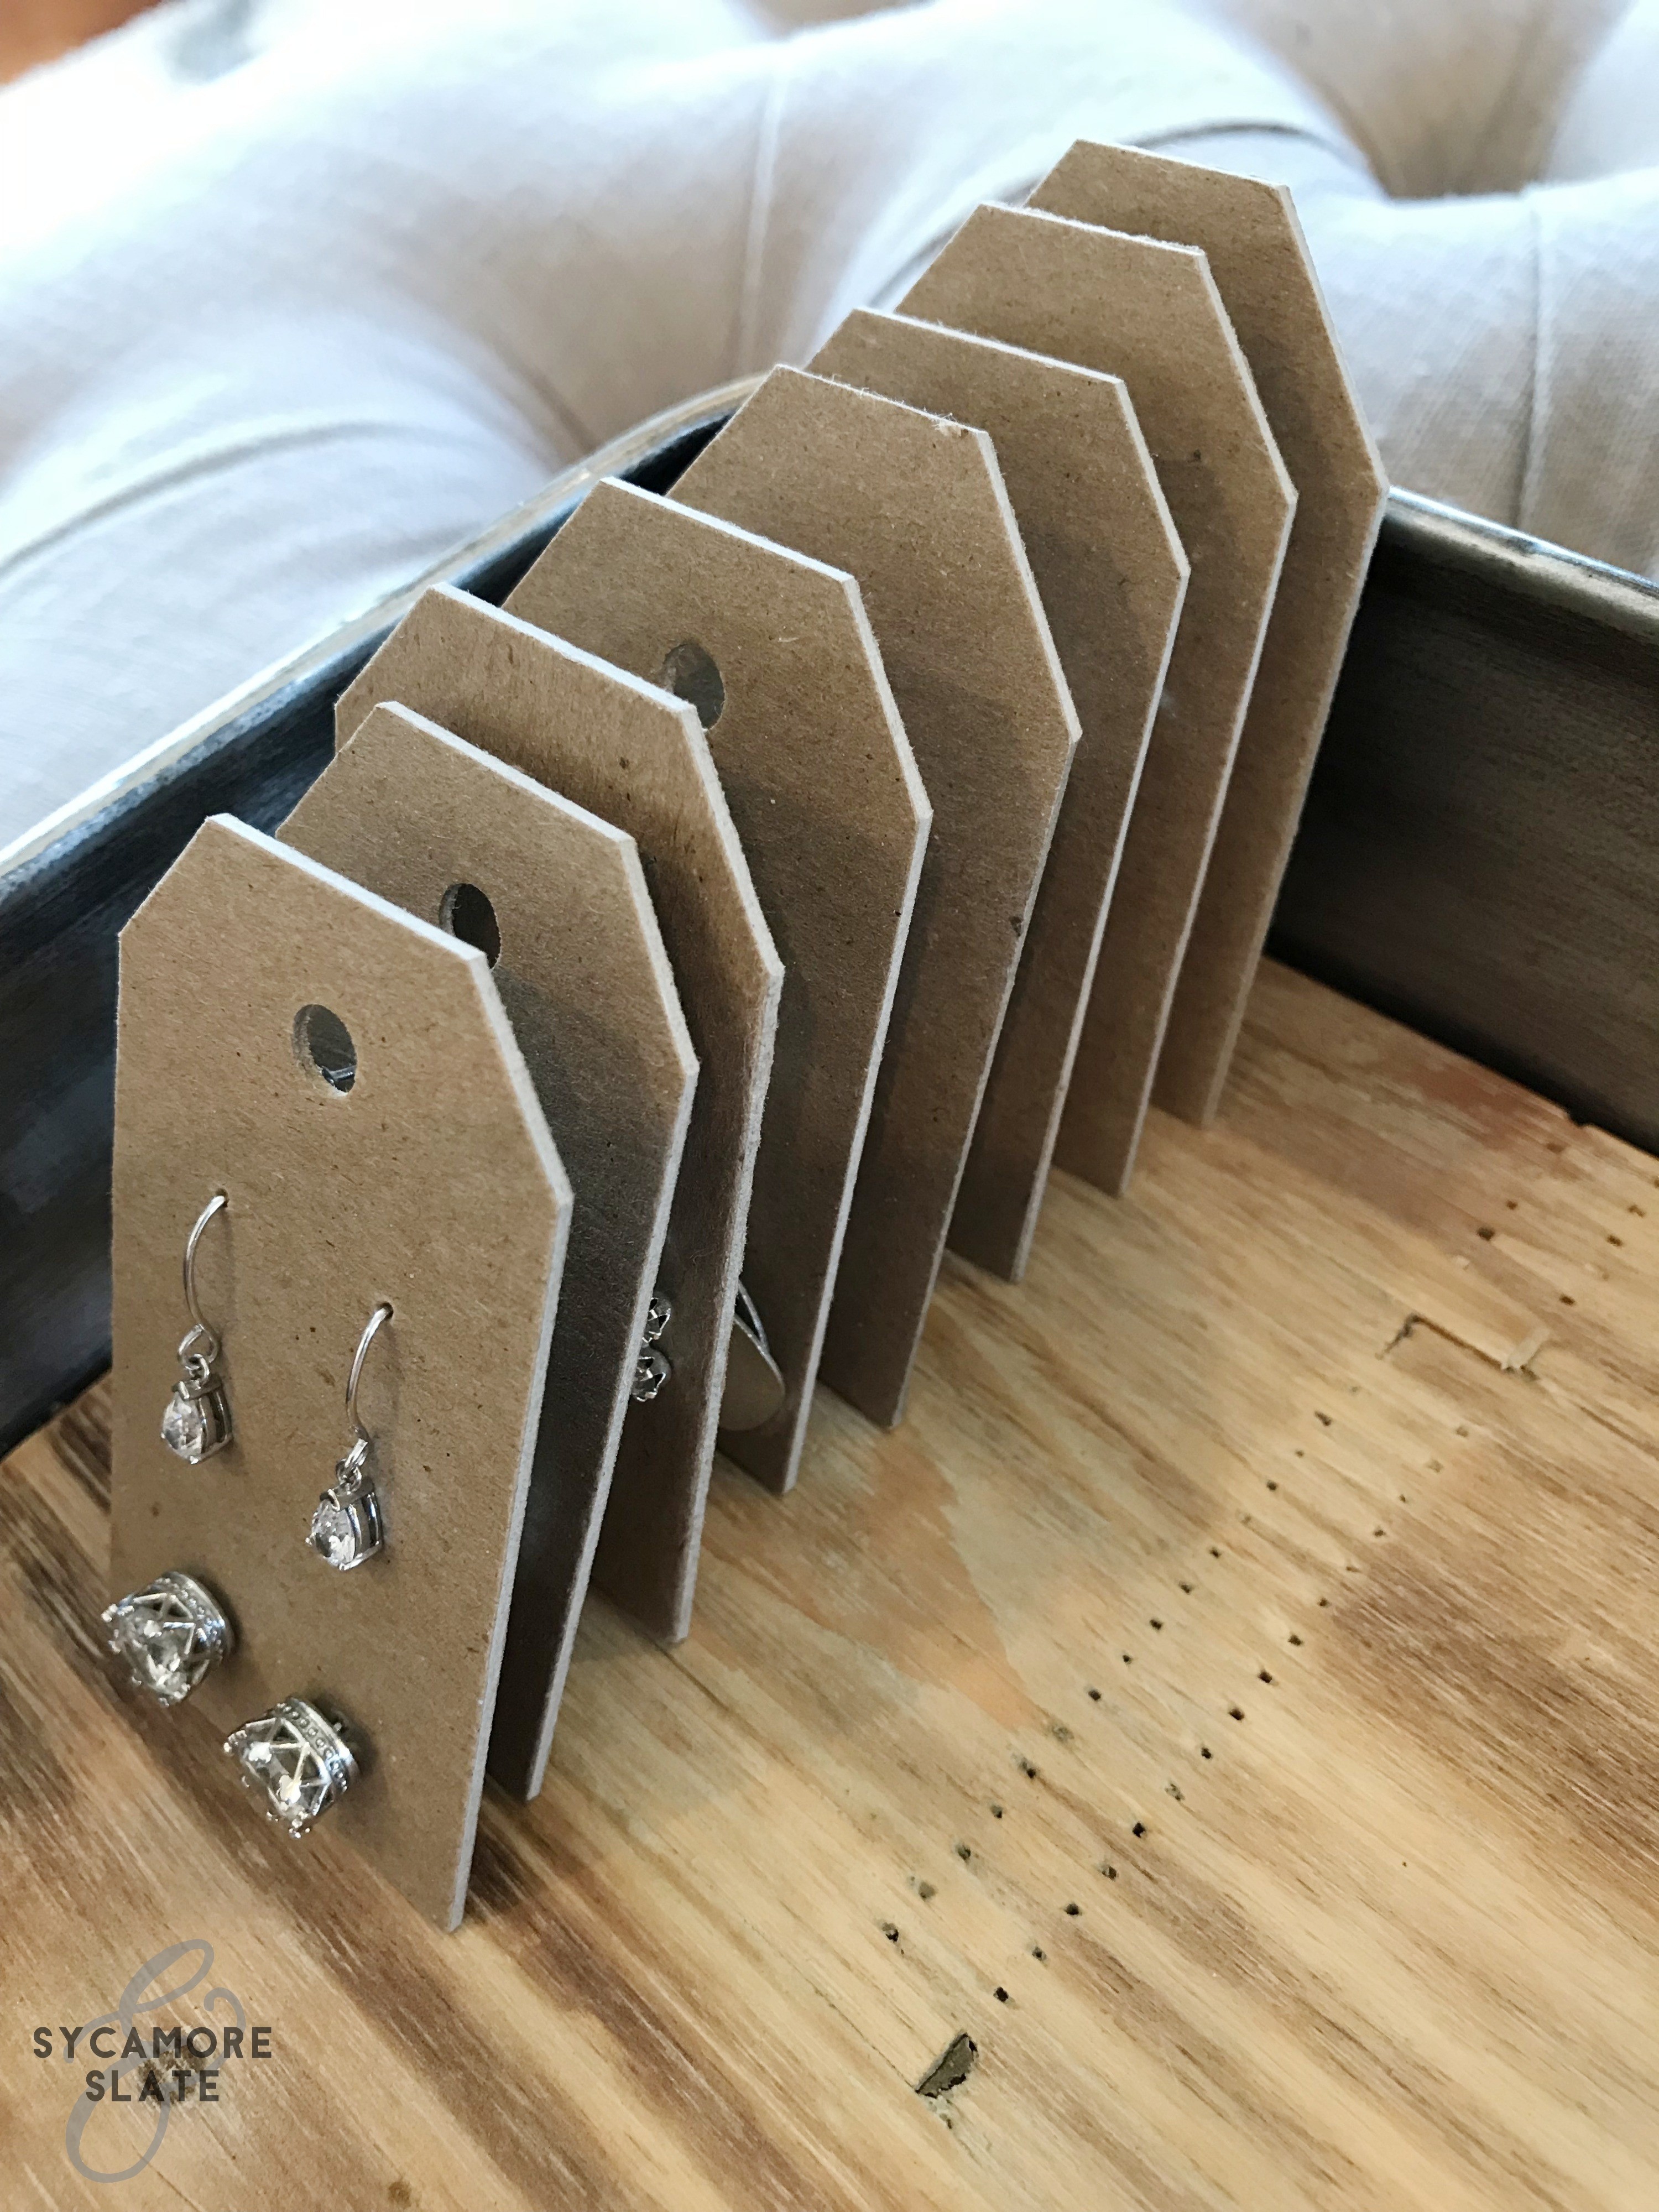
Once all your holes are punched out and your tags are done, you can insert your earrings. Take off the earring backs, insert the posts through the holes, and replace the backs to sandwich the earrings securely on the cards.
Now you can decide how you want to display them. If you want to keep them in a drawer or box, you could just line them up.
You could hang them from twine or strings
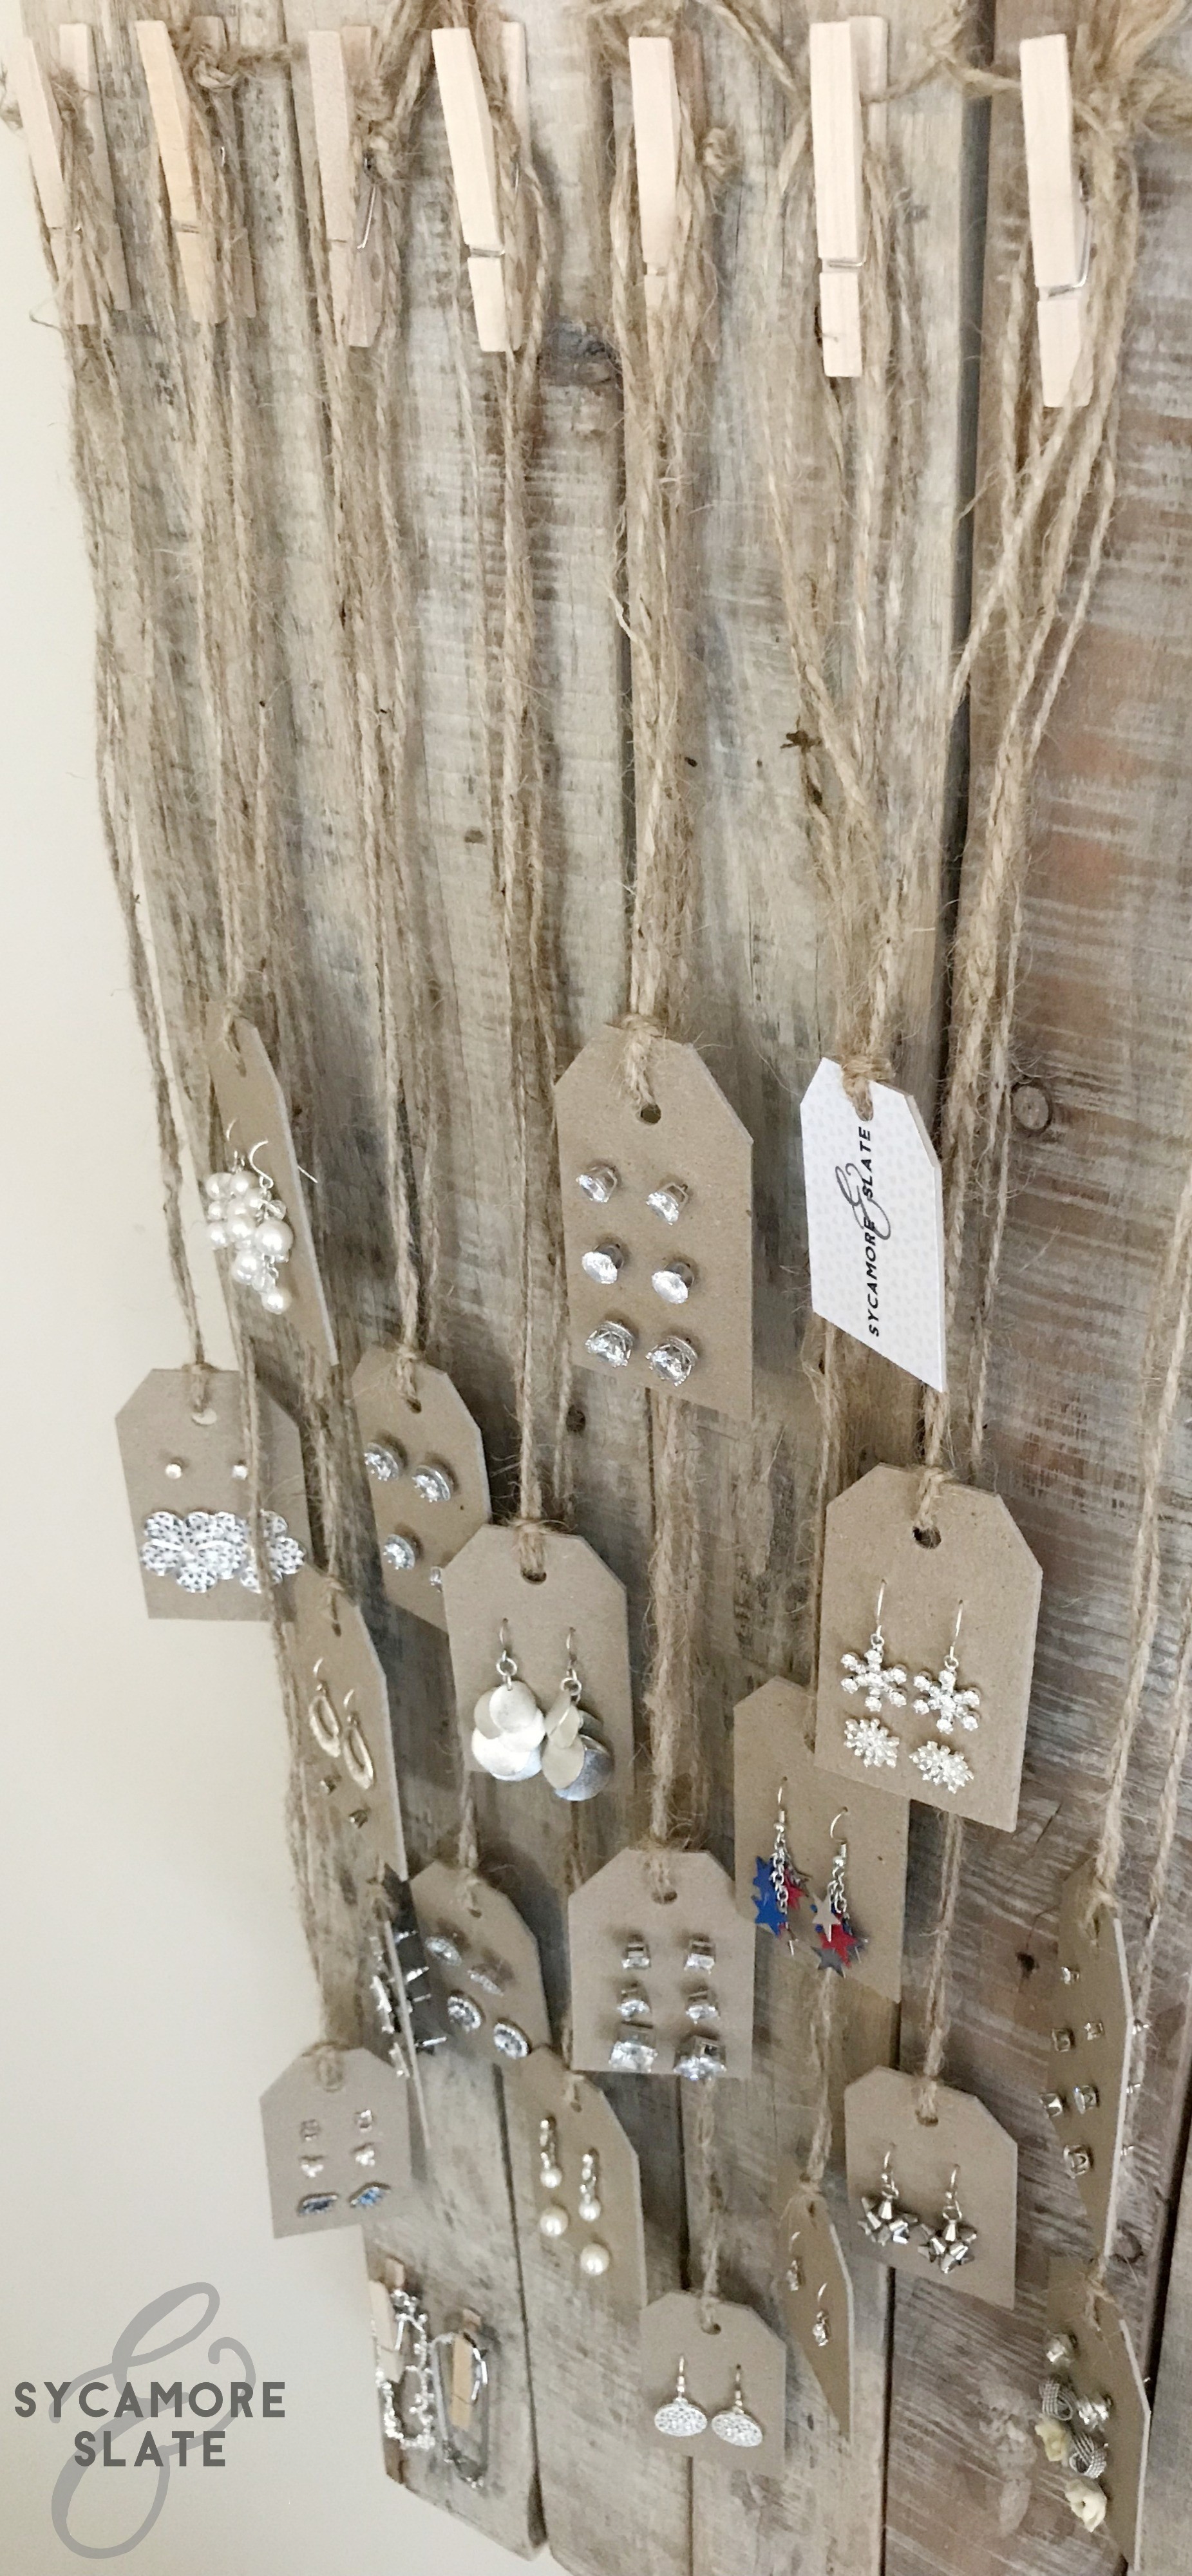
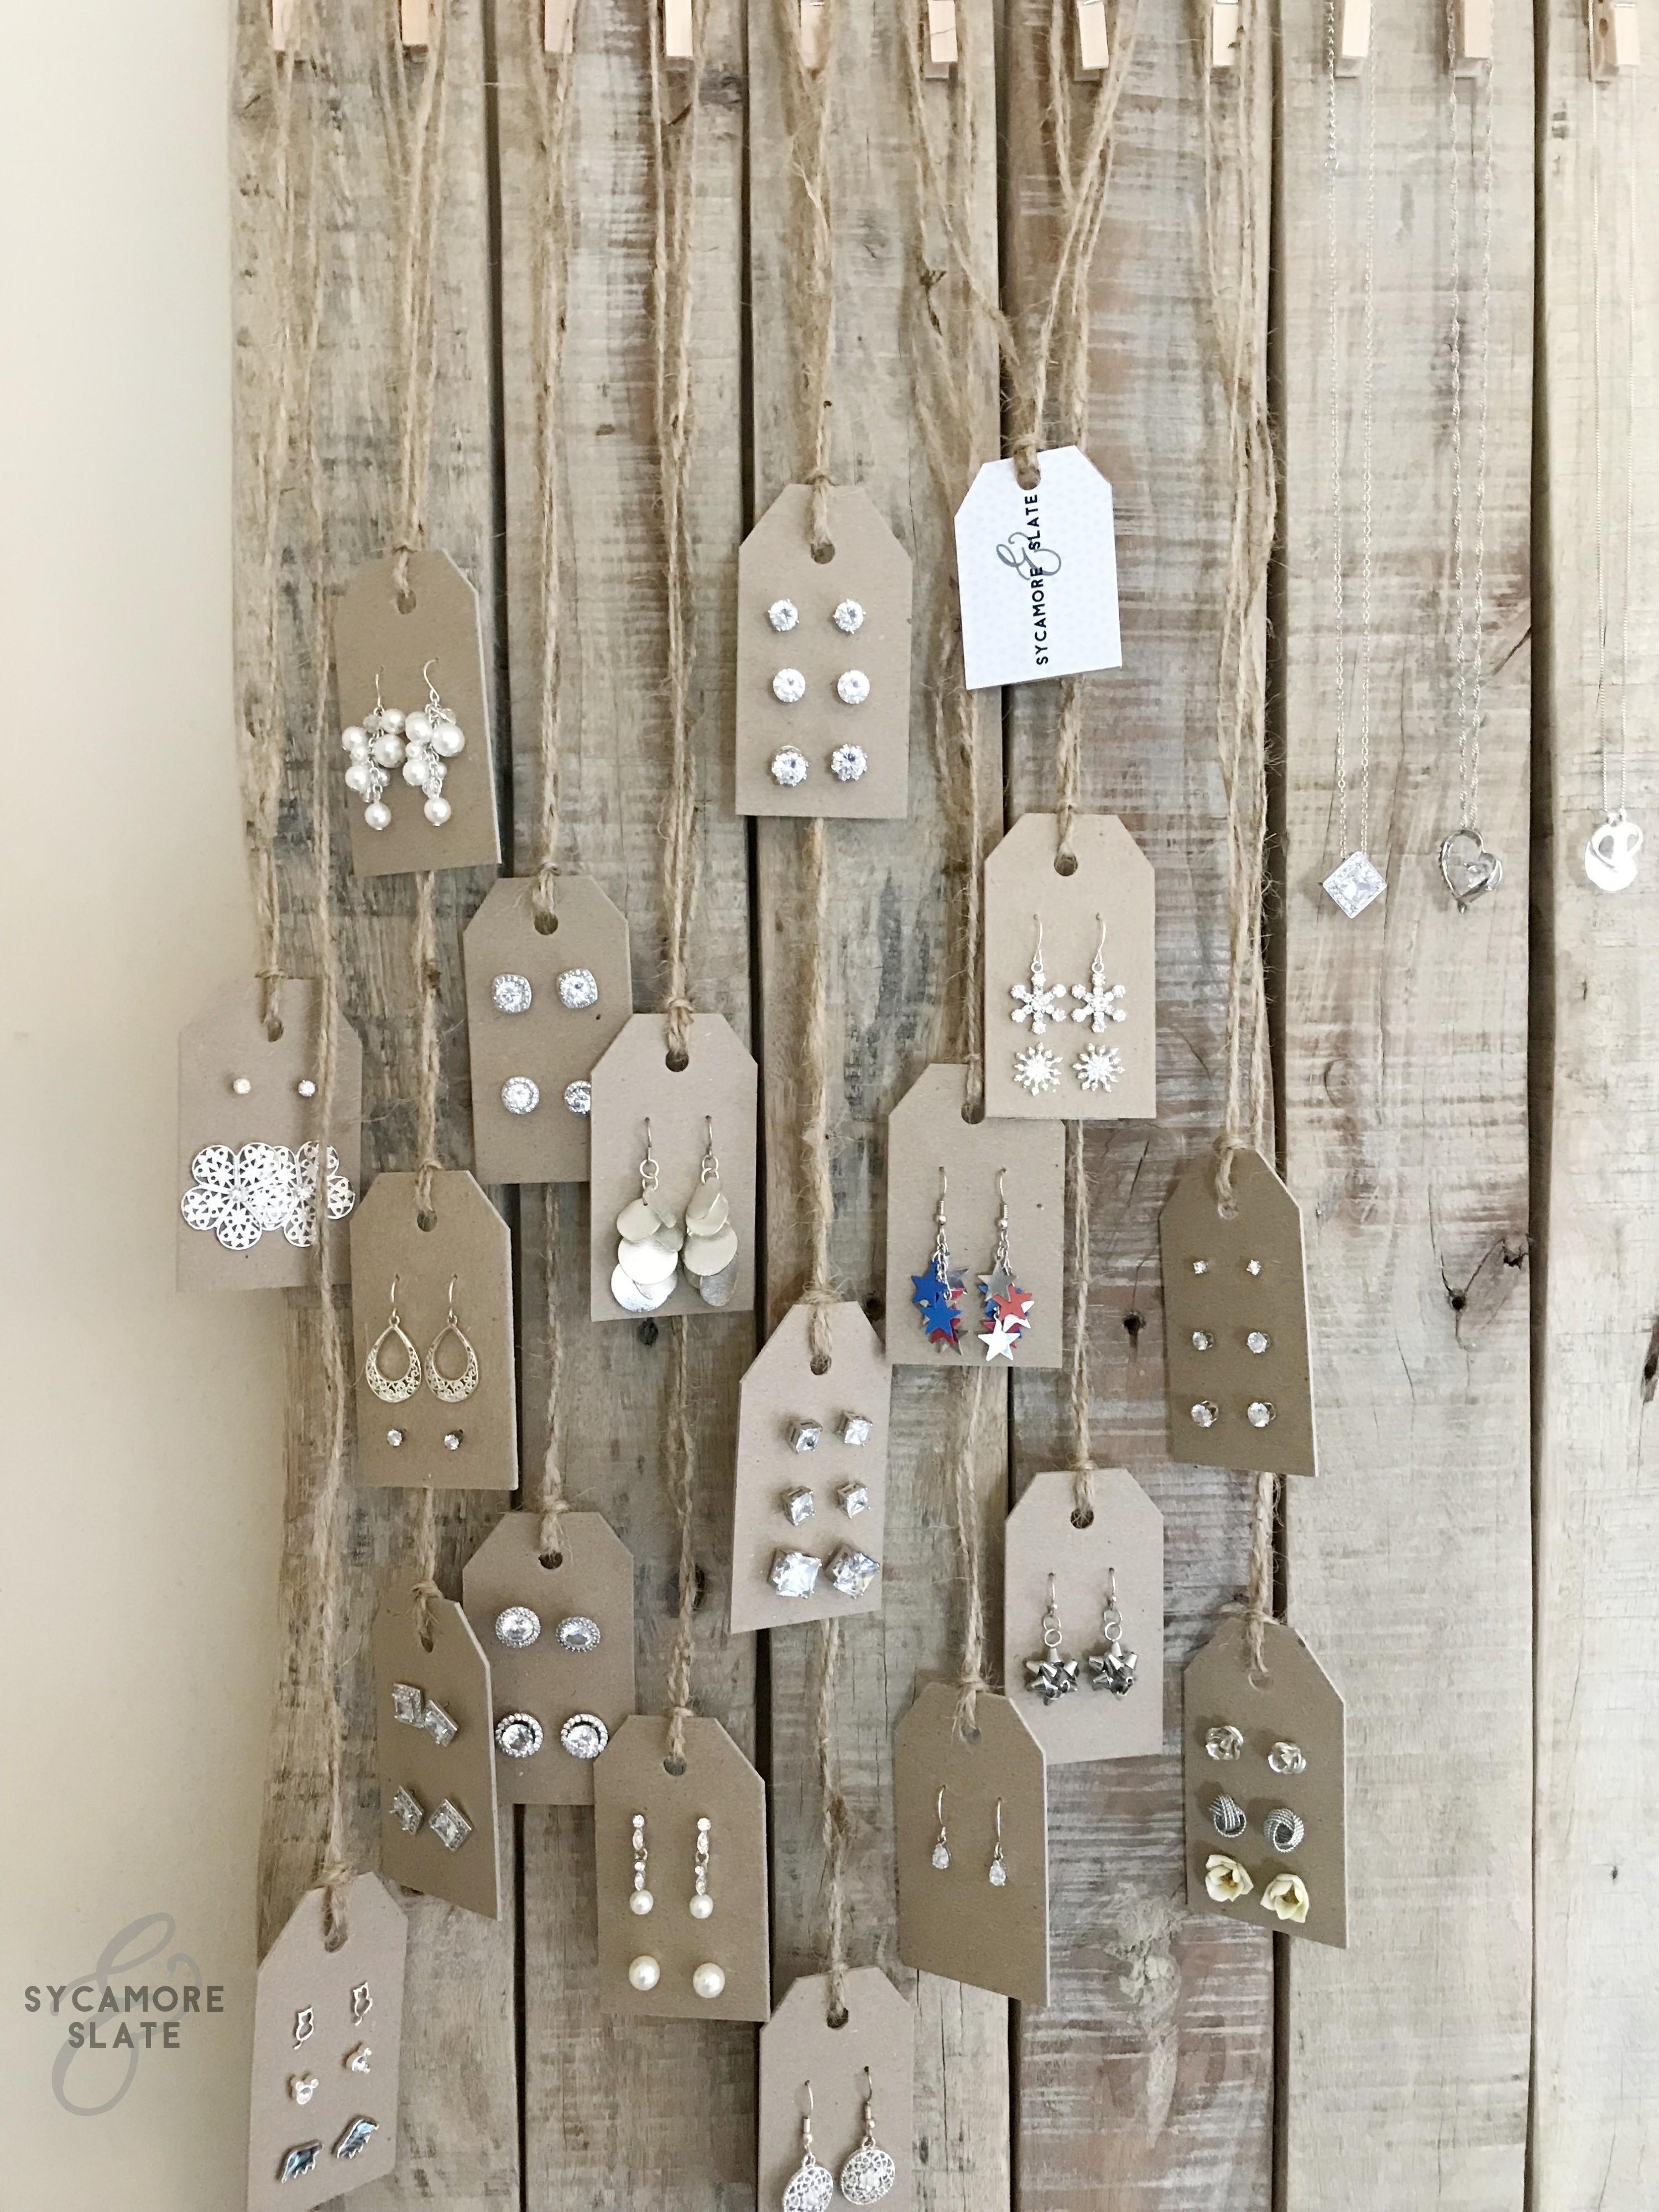
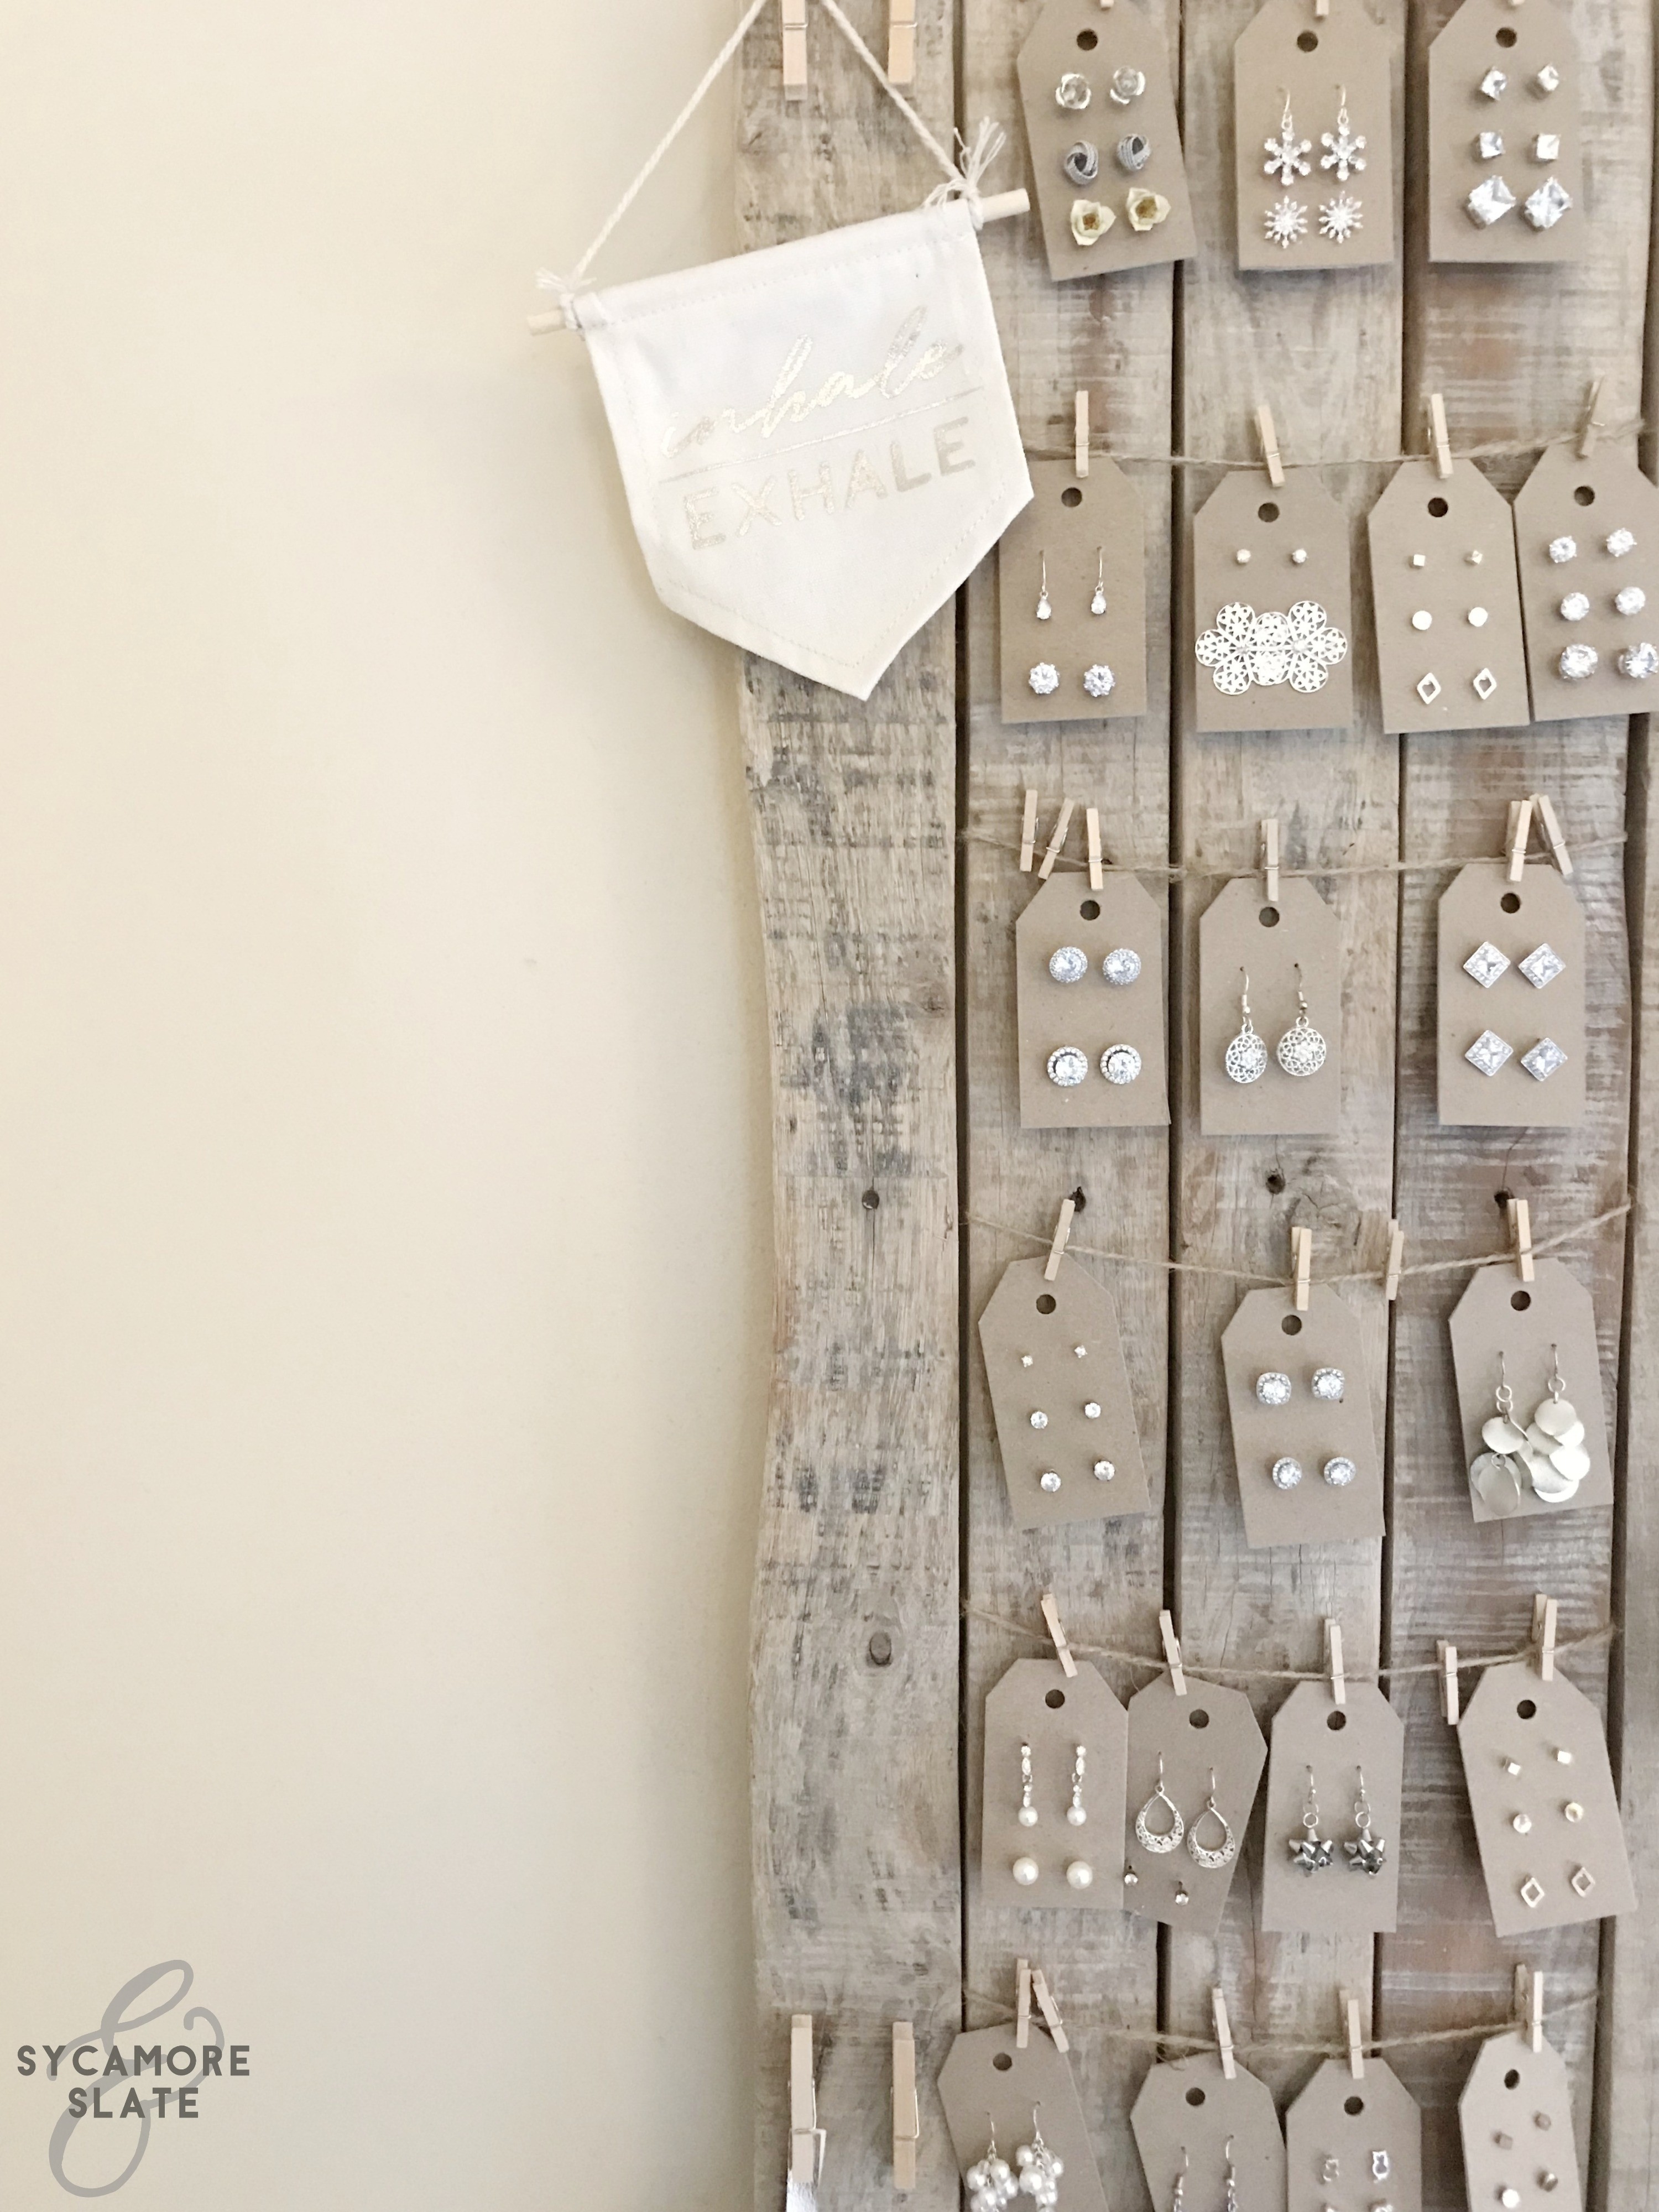
Since I was also going to hang my necklaces and earrings also, I didn’t want so many things dangling together. I decided to use a clothesline-style layout to break up all the vertical lines.
I ended up making a jewelry display board by repurposing an old pallet sign I’d made several years ago. I strung some twine to make little “

Get your free printable below! If you decided to do this project, let me know how it goes in the comments! I’d love to see pictures too!
CLICK HERE or on the picture below to download your FREE printout!
Another post coming soon on my DIY pallet jewelry organizer, so check back to see more about that!

Leave Your Comments